![]()
![]()
![]()
![]()
![]()
![]()
![]()
![]()
![]()
![]()
![]()
![]()
![]()
![]()
![]()
![]()
![]()
![]()
![]()
![]()
![]()
Exterior
Featured
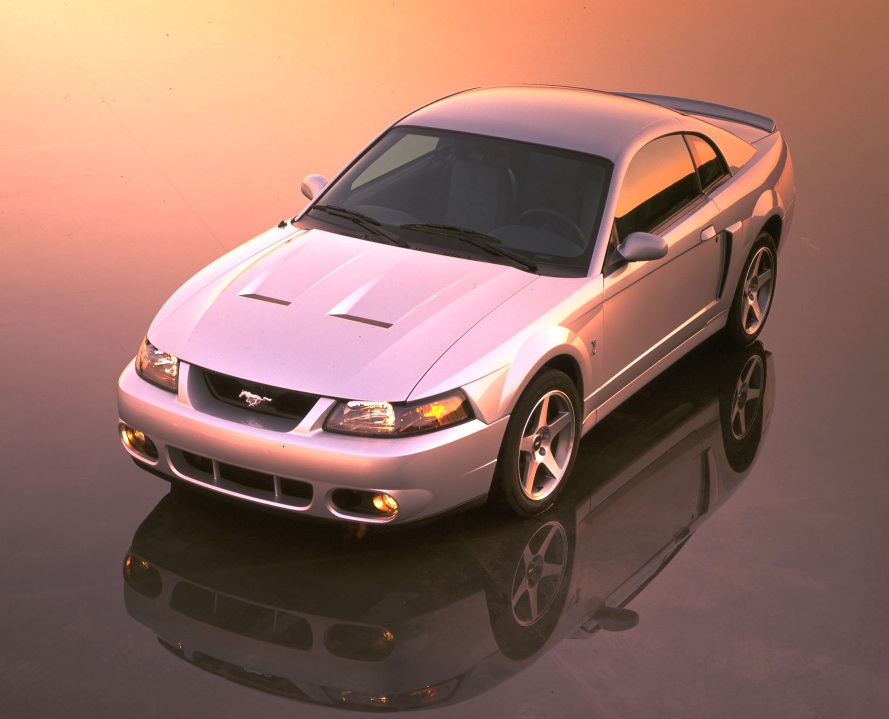
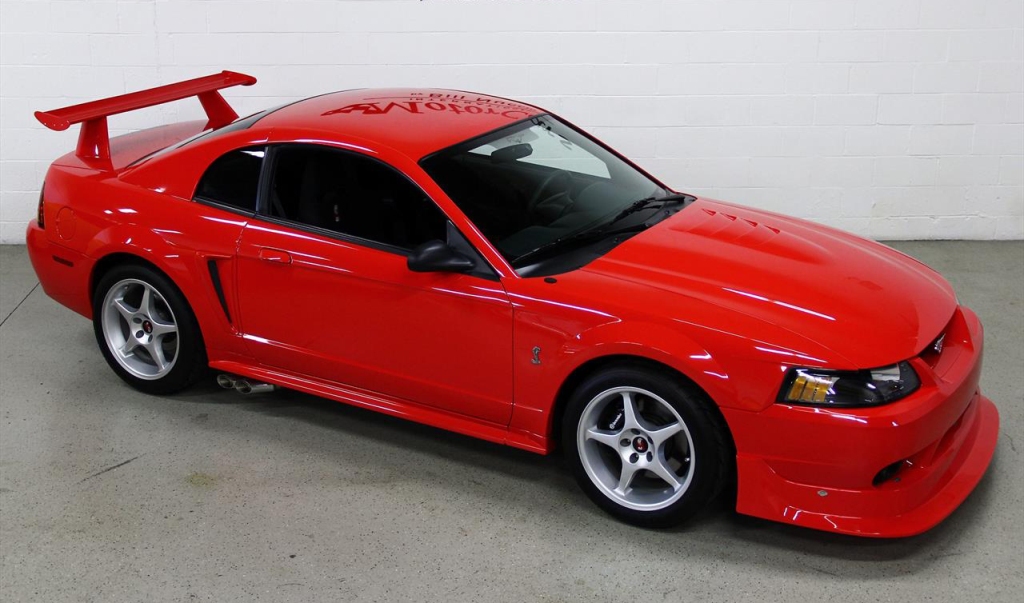
 The
New Edge Mustangs are
fantastic looking cars, and the Cobras are no exception. One of the neat things
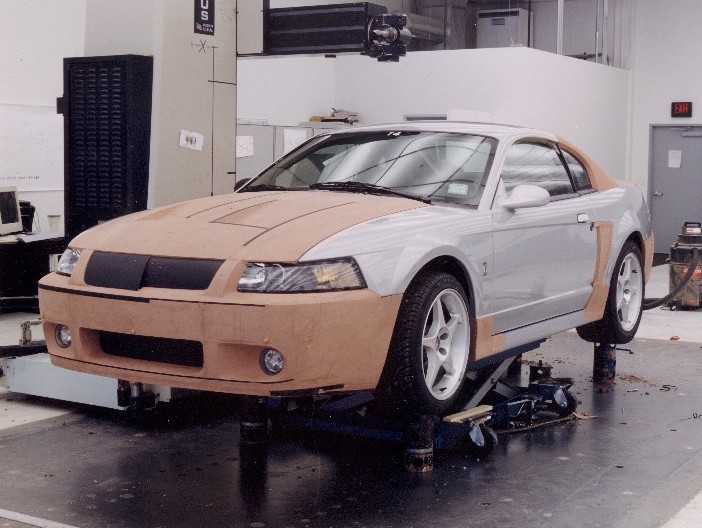
about the 2003 Cobra is that it was sculpted right over an existing Mustang
in the design studio, rather than molded
from scratch on a body buck, or template. It retained the newer DNA, but
became uniquely Terminator; every line portrays the muscular stance that
definitely looks great after
all these years. When
Camilo Pardo took cues from his
Ford GT design and
transferred them to this project, he really nailed it.
The
New Edge Mustangs are
fantastic looking cars, and the Cobras are no exception. One of the neat things
about the 2003 Cobra is that it was sculpted right over an existing Mustang
in the design studio, rather than molded
from scratch on a body buck, or template. It retained the newer DNA, but
became uniquely Terminator; every line portrays the muscular stance that
definitely looks great after
all these years. When
Camilo Pardo took cues from his
Ford GT design and
transferred them to this project, he really nailed it.
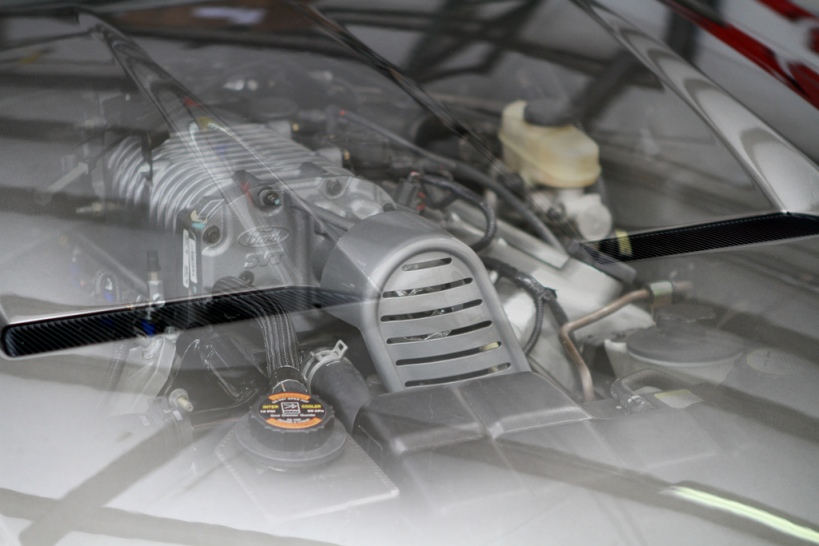
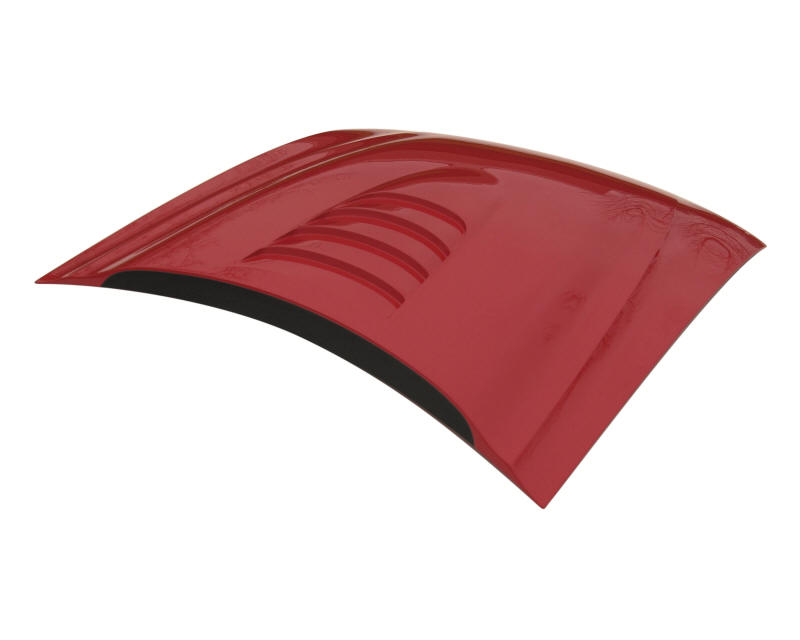
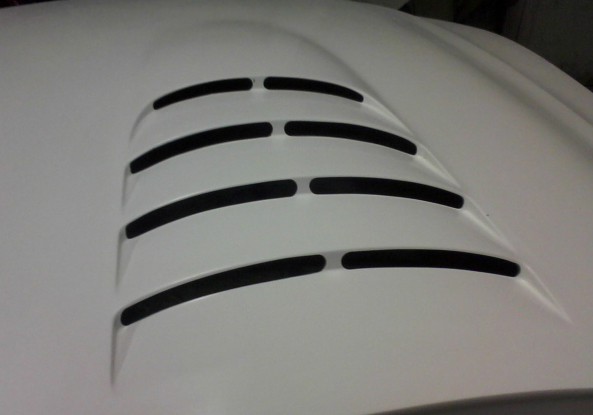
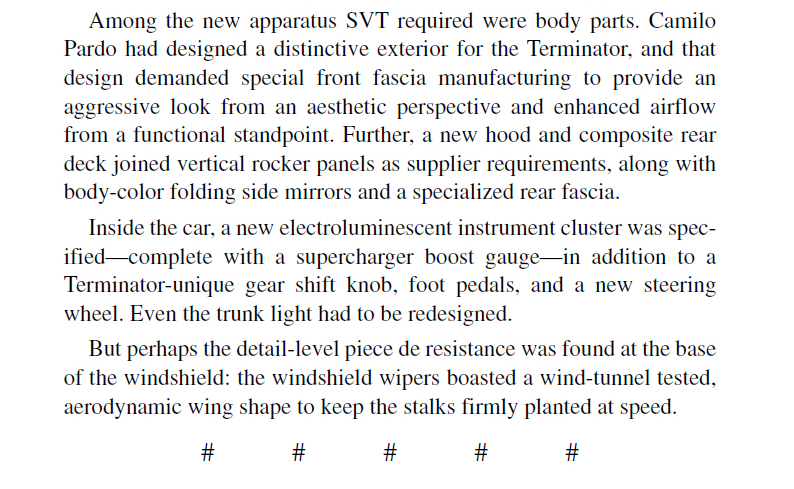
All that being said, the one major exterior item I did want to change was the hood - but not because I didn't like the way it looked. As far as aerodynamics go, the Terminator hood scoops do a decent job of drawing air up through the radiator as well as venting some of the high-pressure air under the hood, but radiant heat is another issue - especially aft of the vents. My main concern was that heat around the engine, and especially the supercharger housing. I wanted a hood vented above the intake that would allow forced air to also move up and around the engine and supercharger, then flow out without being affected by the higher pressure area at the base of the windshield.
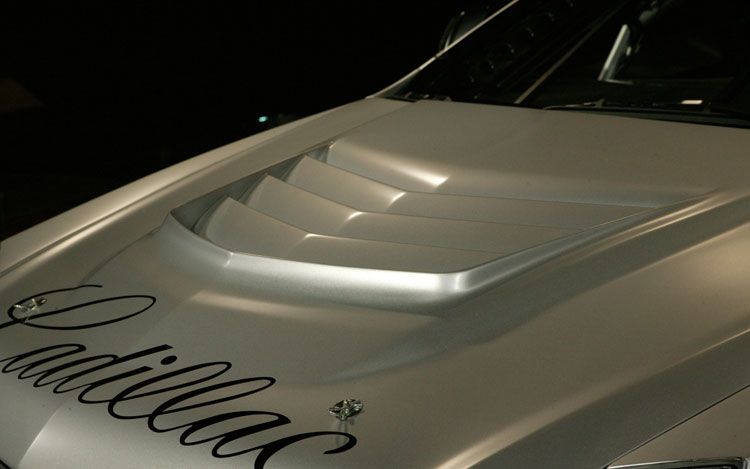
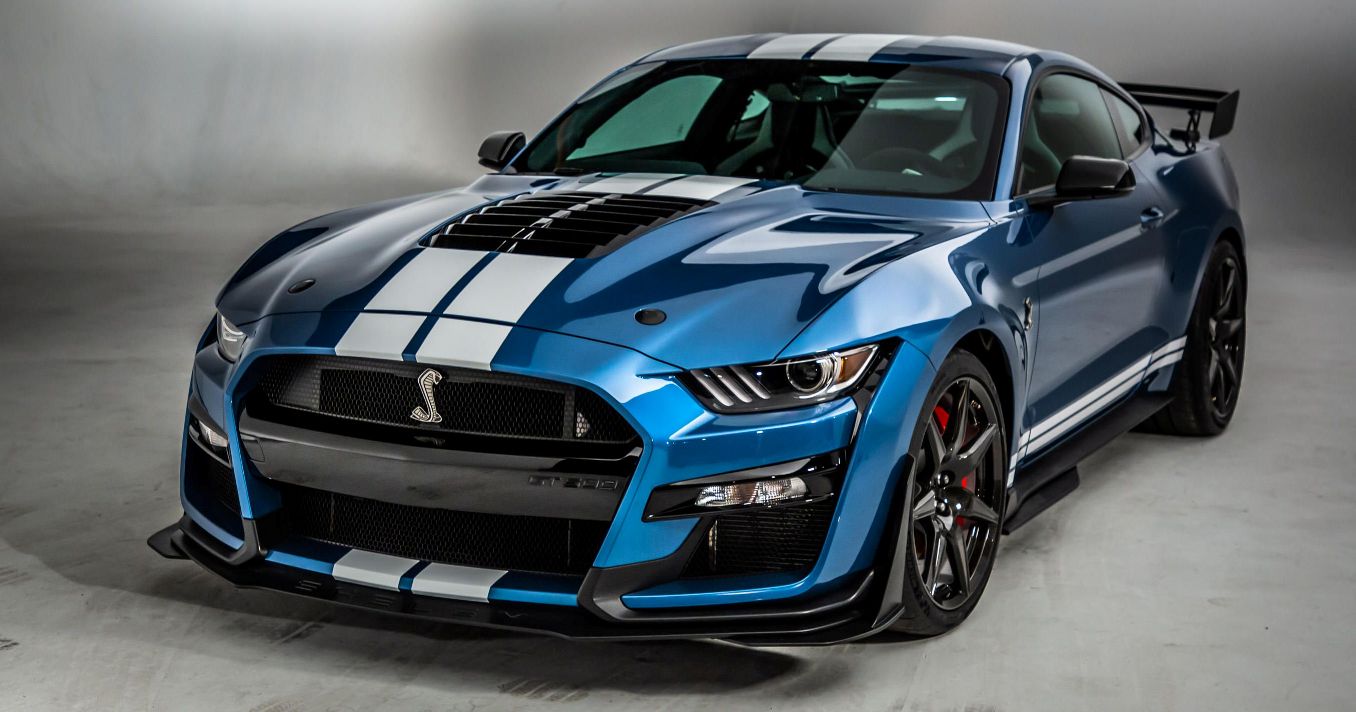
The perfect solution was a Ford Racing M-16612-R00 Cobra R hood, in vented form, which is made by H.O. Fibertrends. I was initially inspired by the Cadillac CTS-V race hood, and although I didn't get as radical, the R hood turned out to be a fantastic addition. Amazingly enough, Ford even added a large central vent on the new 2020 GT500 - go figure. I did also like what Shelby did with the GT-500KR hood, but adding vents on the sides would have involved cutting - not going to happen. So keeping with my theme, the FRPP part was a win for both form and function.
It works amazingly well, looks right at home, and really lets out the engine bay heat nicely. Not only is this a bonus with a supercharger on top, the engine bay itself just doesn't feel as wickedly hot as it did while under the factory hood. With the arrival of a Whipple 2.3 in early '18, this hood contributed even more to lower temperatures. As another plus, it weighs in at right about 25 pounds (approximately 20 pounds less than the OEM hood) - in an absolutely perfect place to drop some weight.
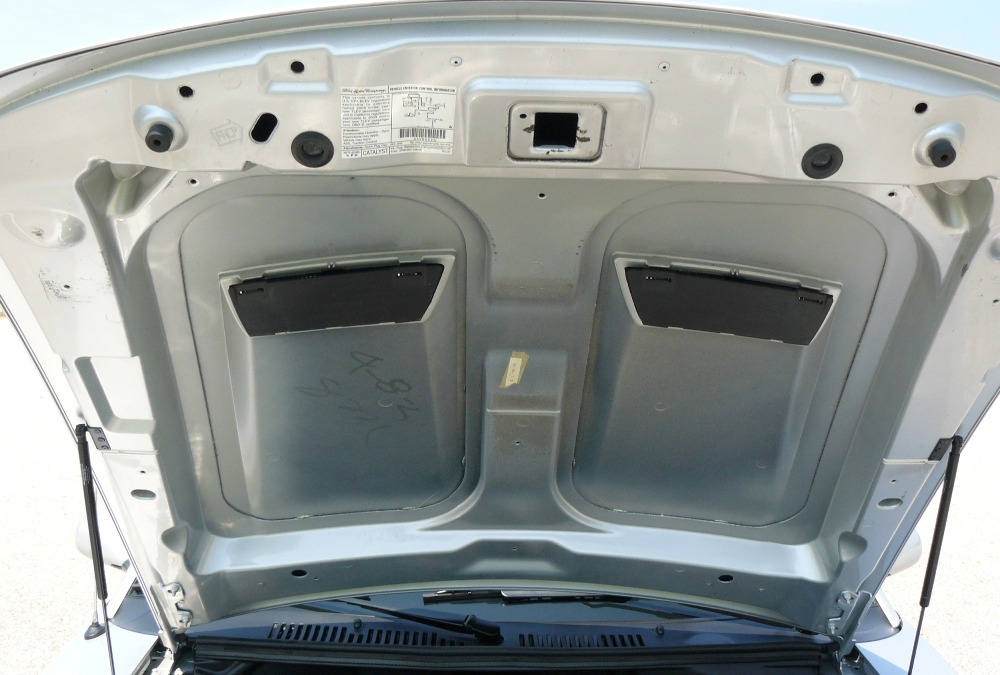
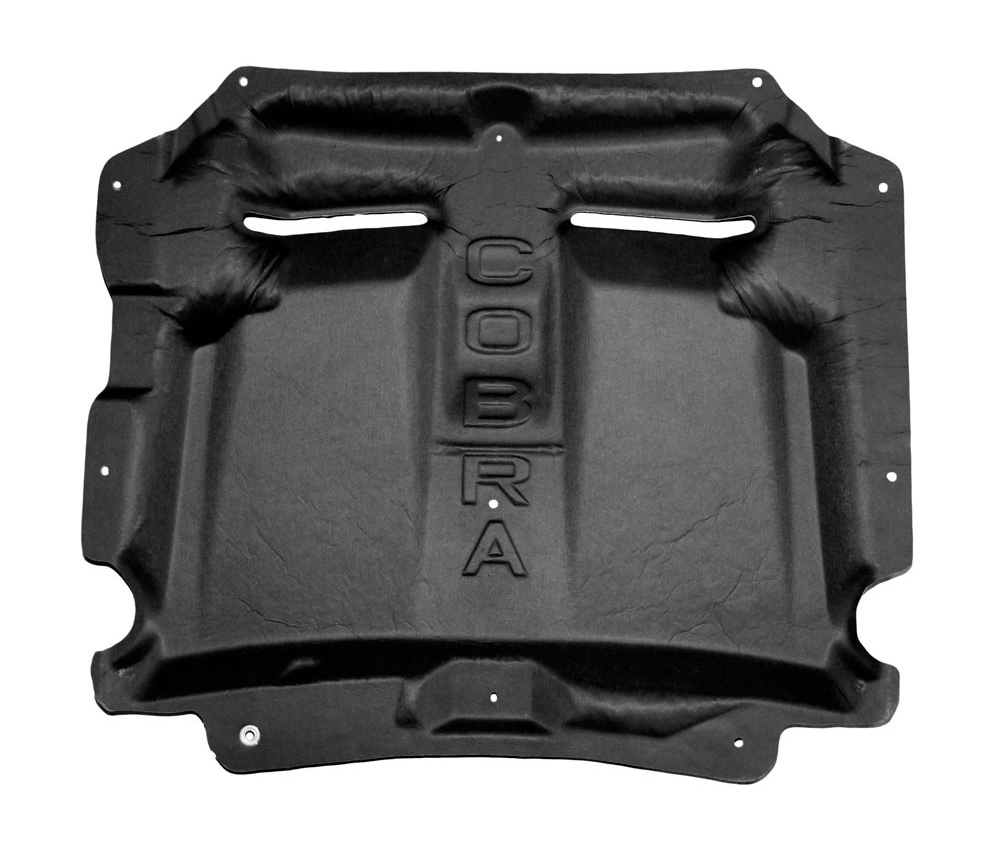
Another bonus here is the removal of the factory hood insulator. Not only do those get beat up, especially if you drive your car in the rain or wash it frequently, but they tend to crumble and leave debris all over. Even better, without it you can let out a little more heat and enjoy more of the supercharger wine. If you are lucky, your stock hood may be completely painted underneath, but the plain look is still much nicer. For those that have to keep the original liner (and hood to go with it), they are still around as 2R3Z-16738-AA, and go for around $110-150.
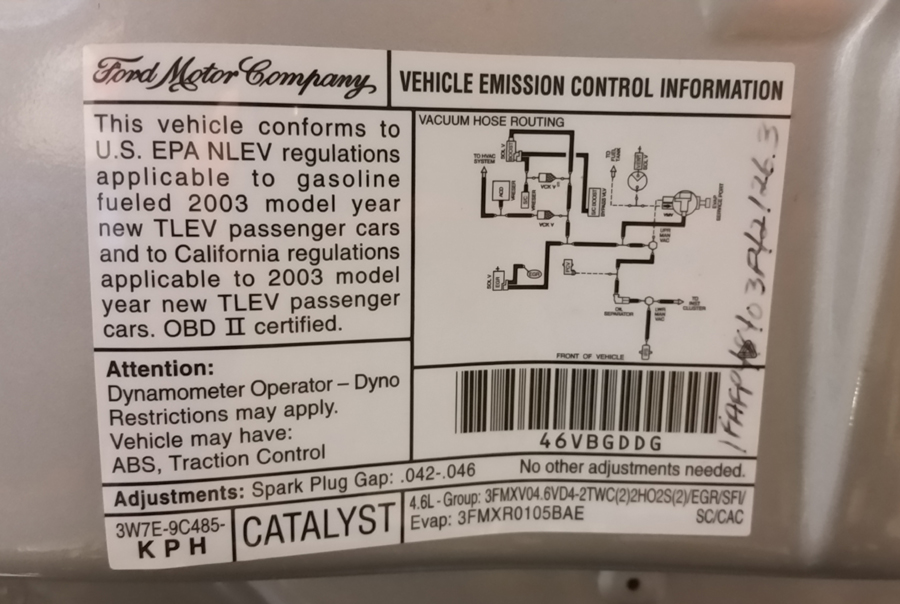
Note: Once you remove your original hood, you will lose the VECI (Vehicle Emission Control Information) label that is placed near the latch opening during the build process. It's not a big deal, but being picky, I had the guys at my local dealer order another one using my VIN - something any Ford parts department should be able to handle. Since the R hood also has the Ford engineering number embossed on it, the new emission label makes it really look like it came from the factory!
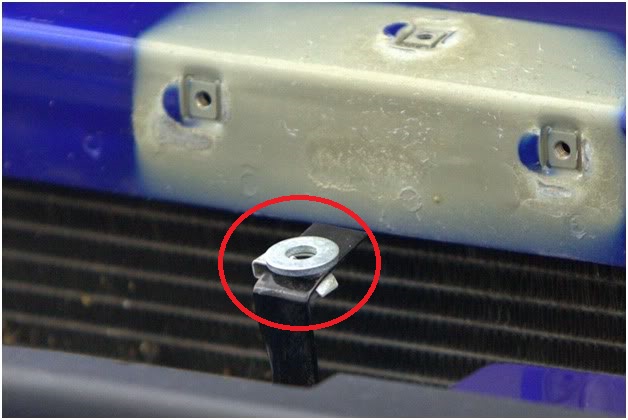
If you do go with an aftermarket hood, there are a couple quirks to think about. First, it's possible that it may not latch properly. Despite a great overall fit, I ran in to the same issue here, but the solution is quite simple: the factory hood latch needed to be temporarily removed, and then a lone washer was placed underneath the locating bracket. This raises the mechanism just enough so the arm will now engage completely (I also removed the locating pins on the latch which gave it some additional vertical travel). I neglected to grab my camera, but since it has happened before, I was able to find a perfect example picture of where the washer is set.
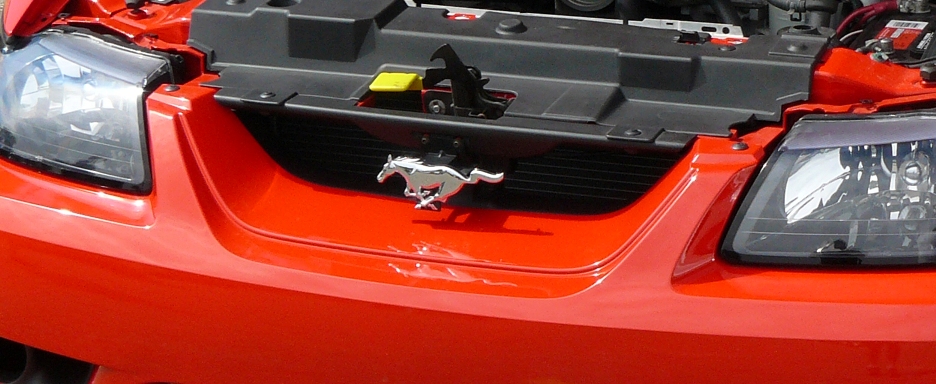
Another item worth mentioning is the fit of the hood at the front edge. The top of the Terminator bumper was redesigned with a bit more rearward rake, which meant the factory hood was shortened slightly to accommodate this. The Cobra R hood is a hair longer to match the opening of the previous Cobra bumpers (as others may be as well), but unless you are looking for it, you probably wouldn't notice. The picture below, and to the left shows the front lip of my R hood, and the one to the right is a factory hood. It's not really an issue, but if you shy away from hoods like this since you heard they don't fit right, this will hopefully clear it up!
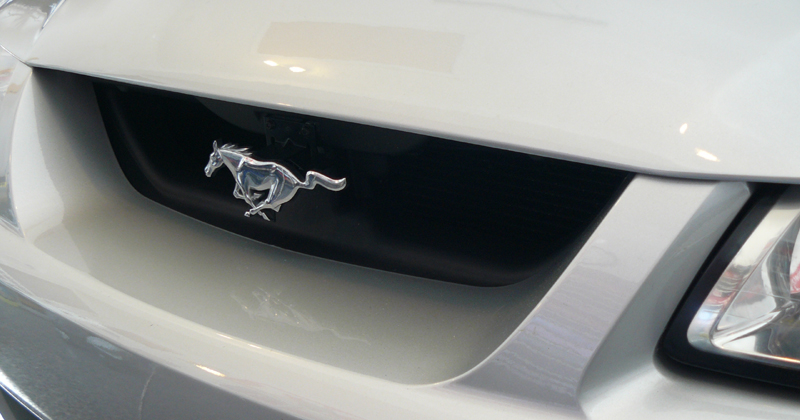

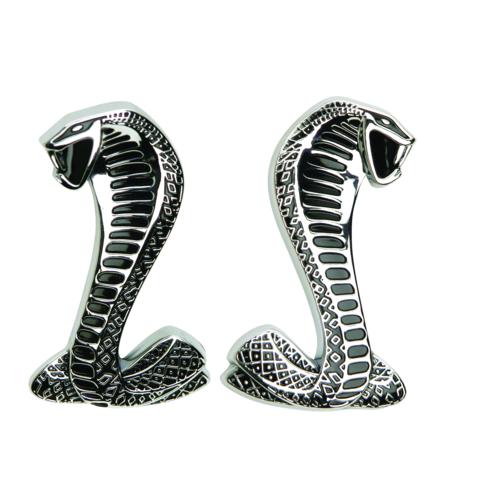
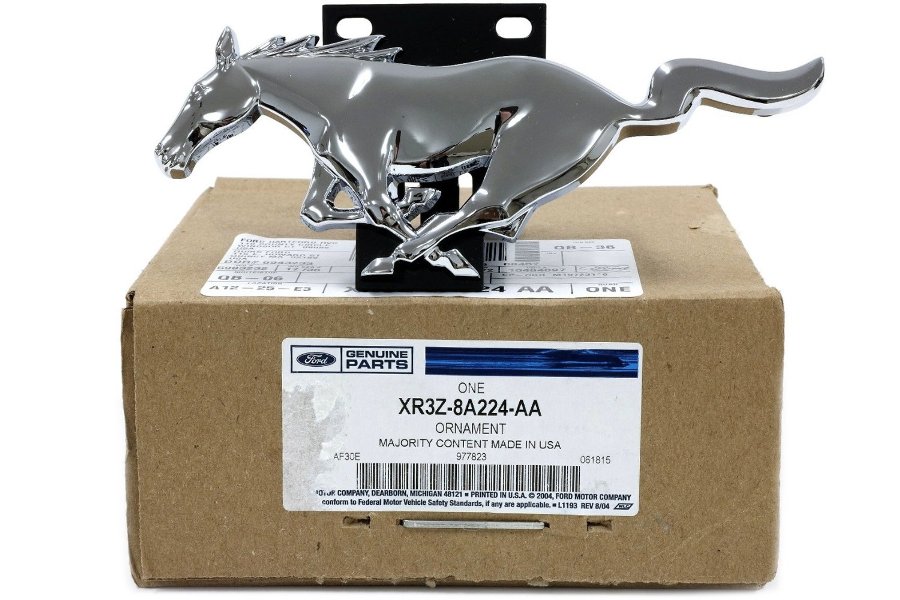
Note: In the above two pictures, the factory Running Horse emblems are shown. Yes, this is what Ford has installed on the Cobra going back to the first model in 1993 - none came with a snake in this area as too many people seem to believe! I can't tell you how many times I hear people comment about a Cobra not being a "real Cobra" since it has a pony in the grille. Any snake you see up there is aftermarket: someone made a bracket to fit and simply stuck the snake fender emblem on it (some face right, and some left)! If you don't believe me, the Ford part number for the pony is XR3Z-8A224-AA. They are still out there.
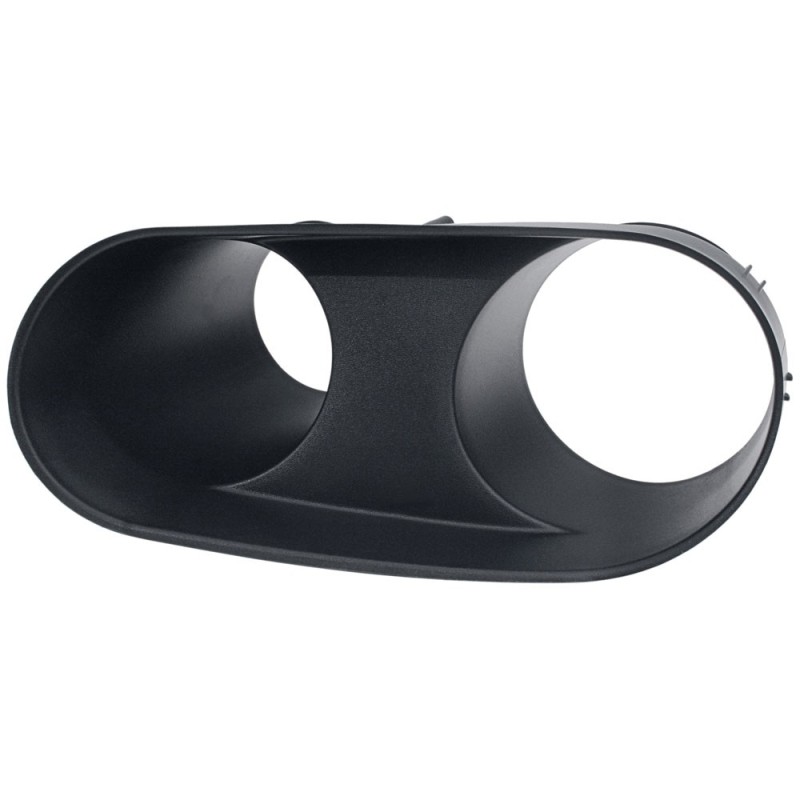
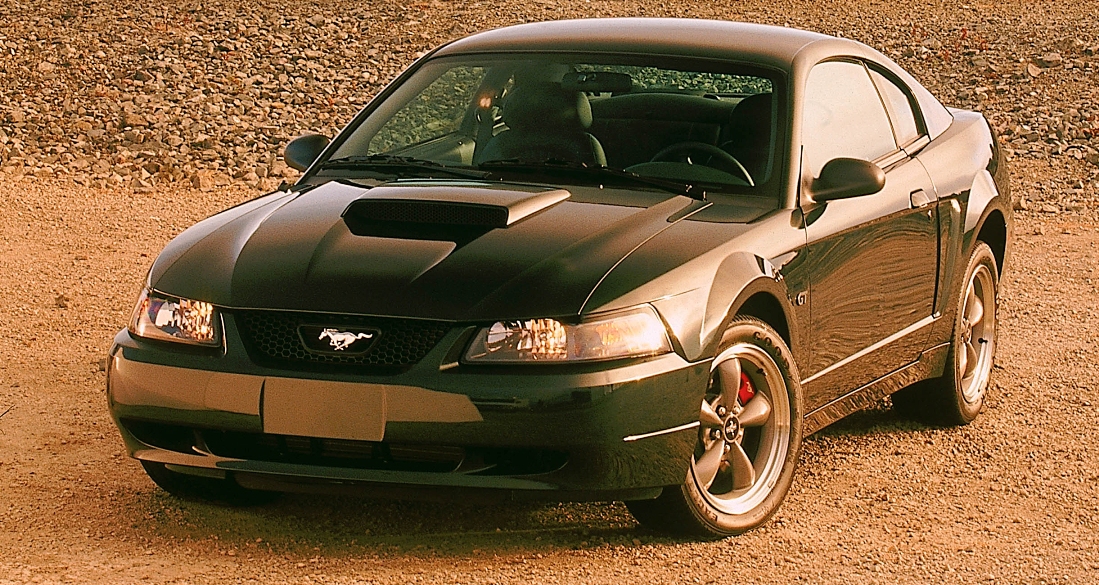
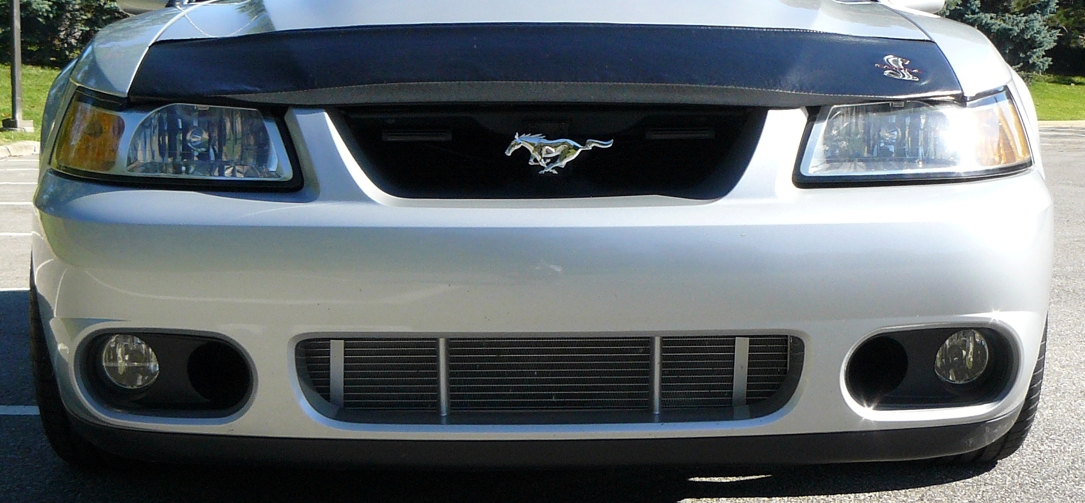 As
just mentioned, the front edge of the Terminator bumper was redesigned on yet
another part specific to the car. Actually, the rake at the hood line wasn't the
only change, and for anyone that knows these, it's always easy to spot this
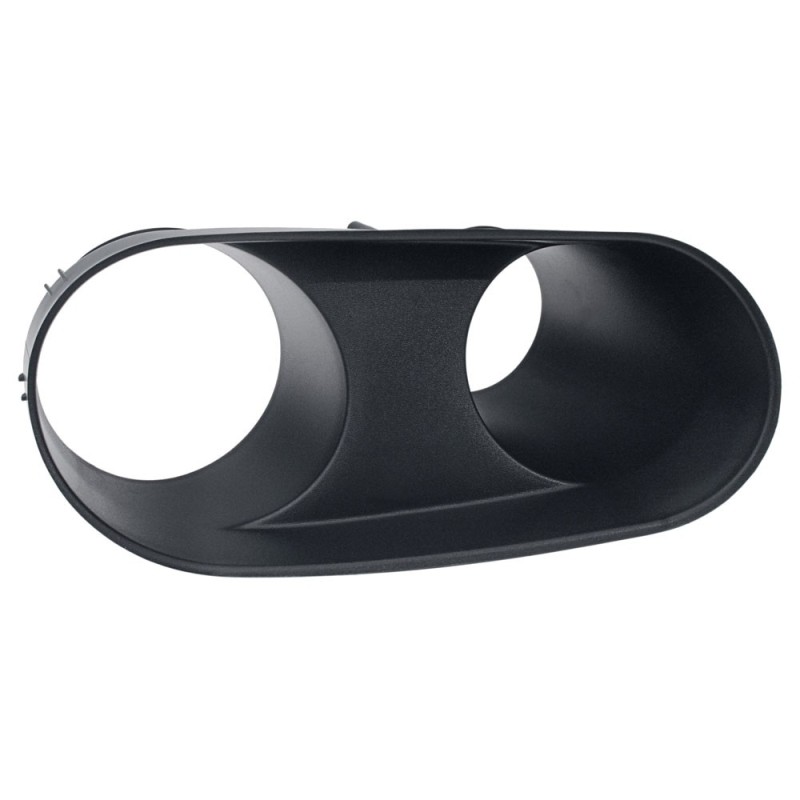
front end with the large heat exchanger opening and the distinct fog light bezels
(those somehow ended up with perfect openings for brake cooling ducts - see my
Brakes & Wheels page for more on that!).
Not that I really needed to point out anything regards to modifying or altering
the front end, but it was worth writing about it just to add some more general
information. Read on...
As
just mentioned, the front edge of the Terminator bumper was redesigned on yet
another part specific to the car. Actually, the rake at the hood line wasn't the
only change, and for anyone that knows these, it's always easy to spot this
front end with the large heat exchanger opening and the distinct fog light bezels
(those somehow ended up with perfect openings for brake cooling ducts - see my
Brakes & Wheels page for more on that!).
Not that I really needed to point out anything regards to modifying or altering
the front end, but it was worth writing about it just to add some more general
information. Read on...
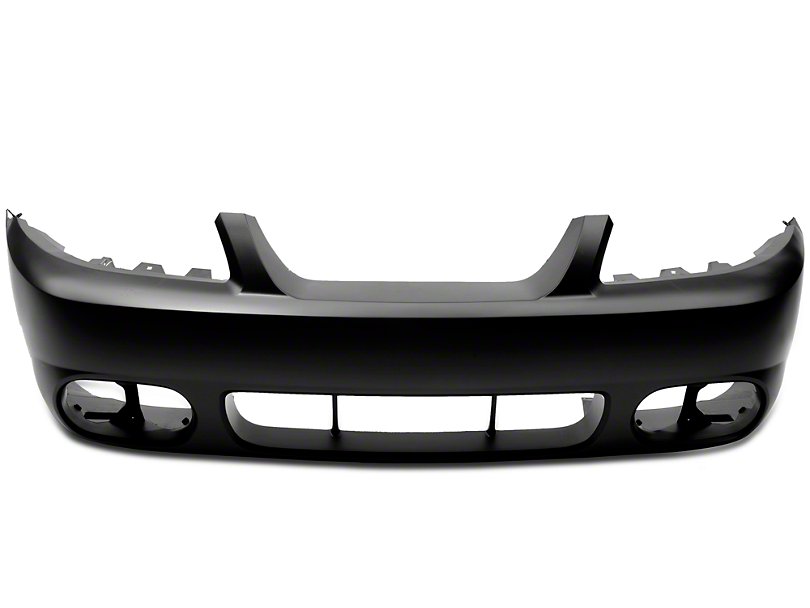
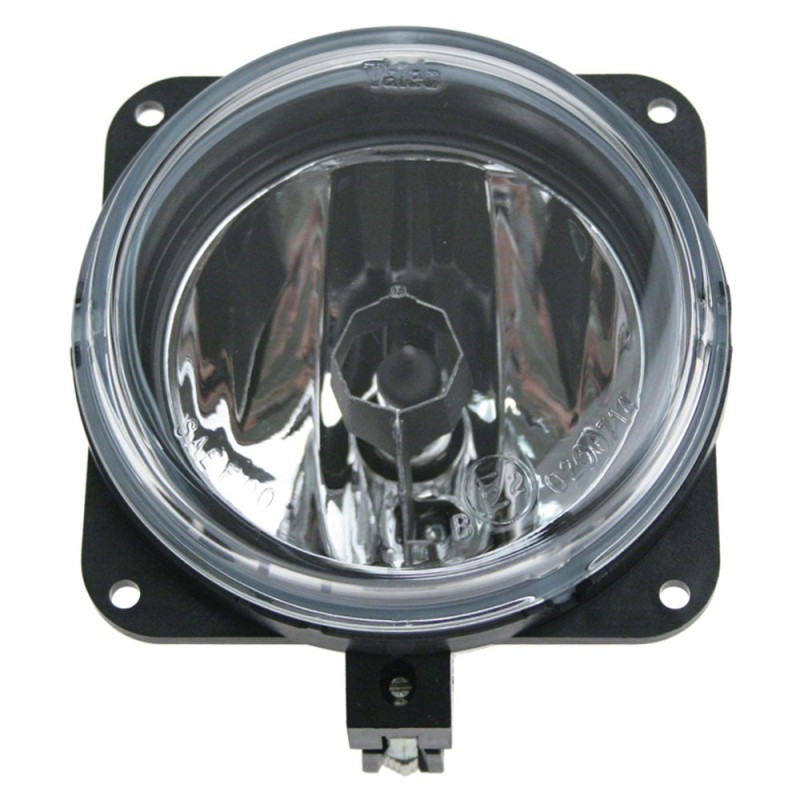
If you happen to need a new one, they are still in the Ford system for those picky about using OEM parts. The bare bumper (actually, bumper cover to be precise), 2R3Z-17D957-BA will run just over $400, and for that price, it's hard to justify going with an aftermarket version that may or may not fit well. Again, the fog light bezels are also matched to this bumper, and amazingly enough can still be purchased through any dealer as well. They are 2R3Z-15B438-AA (RH), and 2R3Z-15B438-BA (LH), with both running about $25 each. Additionally, the original fog lights are still available (2M5Z-15200-AB), initially sourced from the Focus and still fitting several other vehicles along with the Terminator. If you need one, plan to shell out just about $50, which isn't all that bad.
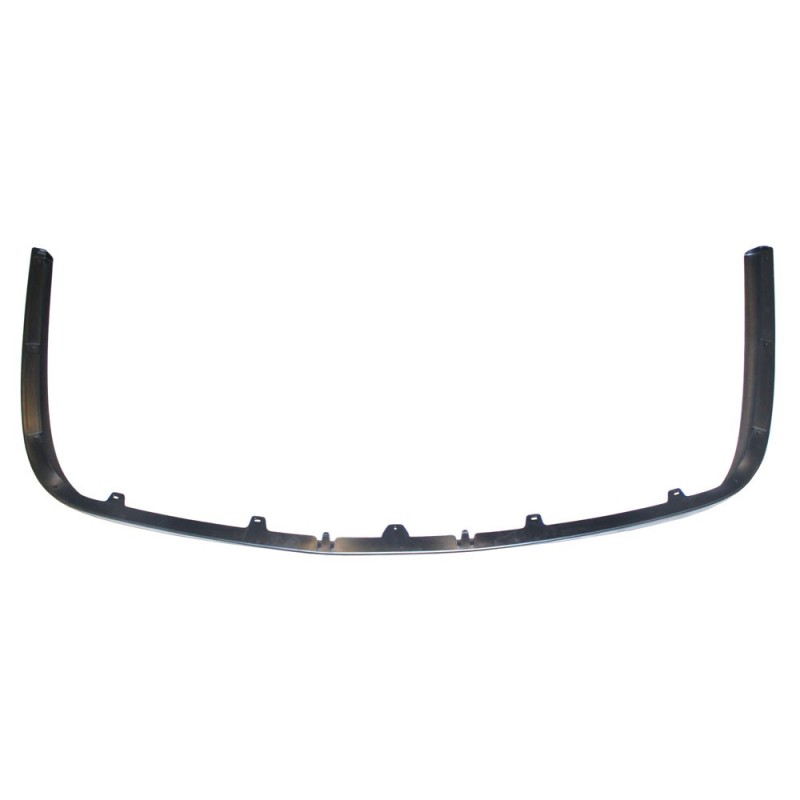
Last, but not least - one of the biggest gripes ever heard by Terminator owners about these unique parts: the chin spoiler! Just about anyone that drives theirs regularly has probably dealt with the annoyance of a great looking car dragging around a beat-up lip under the bumper. Granted, that is what they are there for (the flexibility of it actually makes them fairly durable), but after years of abuse, it's common to want a new one to refresh the front end. The original from Ford, 2R3Z-17626-AAA, is still around - coming in at well over $400 (more than the bumper cover itself!). Ouch. Never fear, however, since Latemodel Restoration has come through with a perfect replacement for a mere $200. From what I have seen these are about as close to the original as can be, and for the price, a complete steal. If you are meticulous about the appearance of your Terminator, get on this right away!
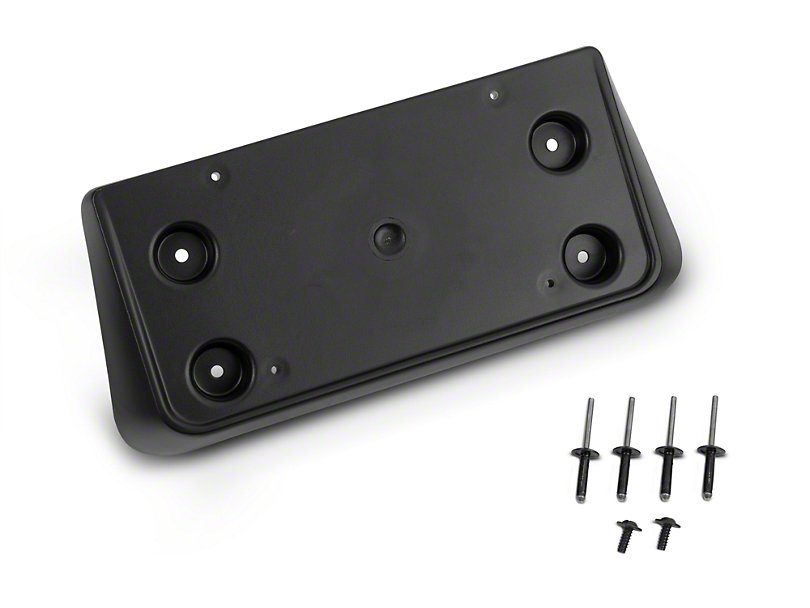
Note: One of the peculiarities of the front end involves an annoying, and mostly optional, license plate bracket. If you happen to live in a state that requires these (for those of us that haven't "forgotten" to install one), it's always worth having on hand to at least show some intent of possibly mounting it if your local authorities take notice. Some cars came with them tossed in the trunk, and if you were real unlucky, the originating dealer may have even installed it - which requires drilling four holes to rivet it in place. They are also still in the Ford system as XR3Z-17A385-AA (going for around $50 for the kit) and fit all Mustangs from '99-'04. Not really a great investment, but probably better than the price of a ticket!
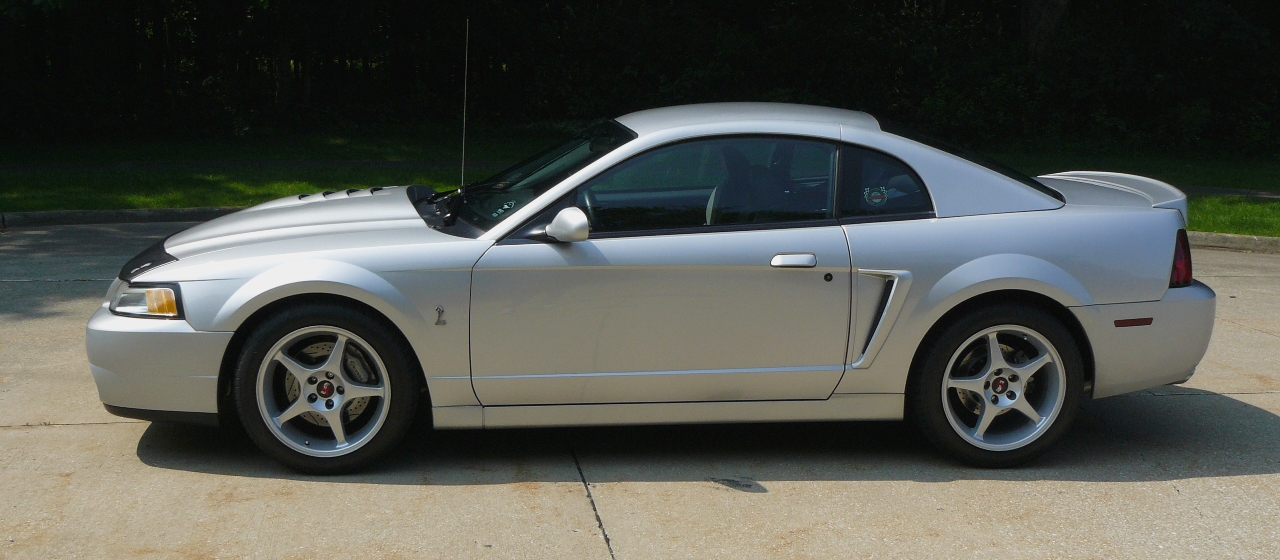
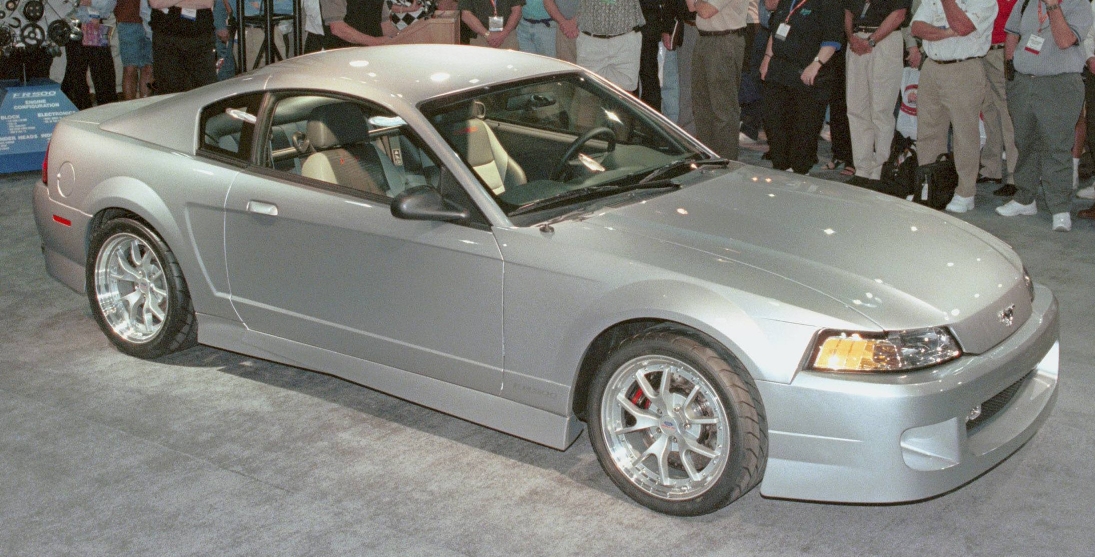
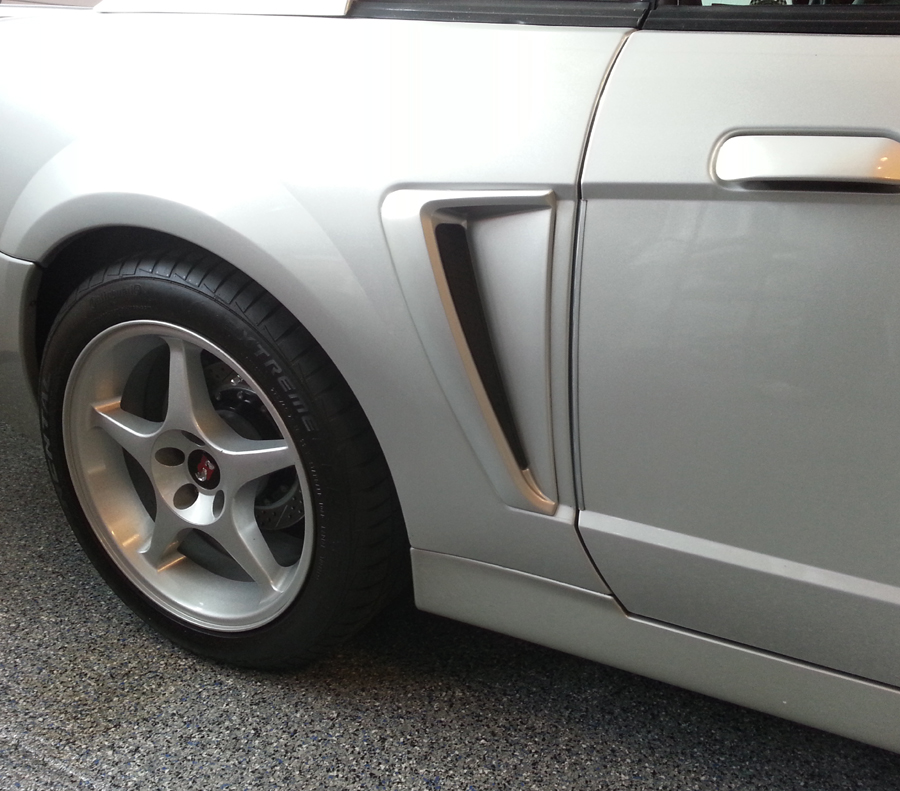 One
of my first projects in 2015 was to remove the
factory side scoops. I'm probably in the minority when it comes to lacking a
fondness for them, but I always thought this "aggressive" version on the
Terminator gave the side of the car a little too much paunch. It was a
perfect excuse to tone it down a bit, especially since the 2000 Cobra R
scoops look right at home - yet another match to my theme.
One
of my first projects in 2015 was to remove the
factory side scoops. I'm probably in the minority when it comes to lacking a
fondness for them, but I always thought this "aggressive" version on the
Terminator gave the side of the car a little too much paunch. It was a
perfect excuse to tone it down a bit, especially since the 2000 Cobra R
scoops look right at home - yet another match to my theme.
In all honesty, the scoops on the R weren't actually unique to it alone, they were simply those used on the base model, (each Cobra R started out as a V-6 chassis) as well as the GT and pre-2001 Cobra. As much as I also liked the "scoop delete" used on the resurrected 2001 Mustang Bullitt, they are obsolete from Ford and always on the pricey side if you can even find them on the used market. I also had no desire to mess with any sheet metal and body work that would have been required to eliminate the scoops altogether (like one of the original FR-500 prototypes) - way too much work there. Fortunately the base model versions were plentiful, and in my opinion, look fantastic.
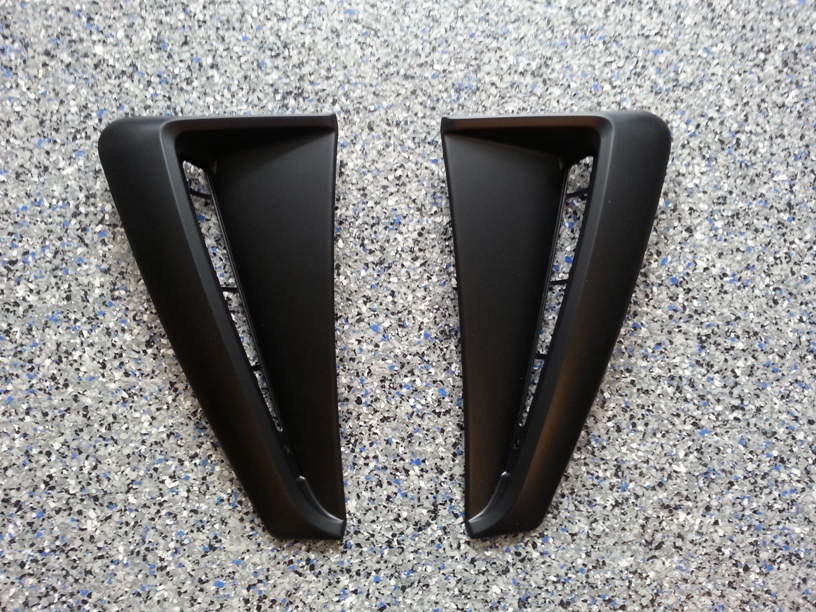
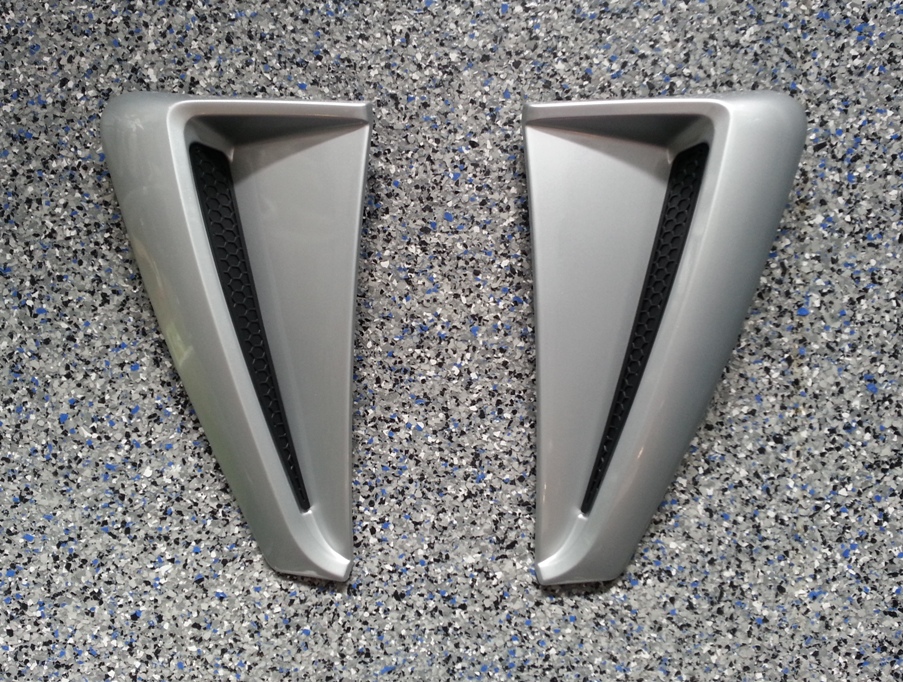
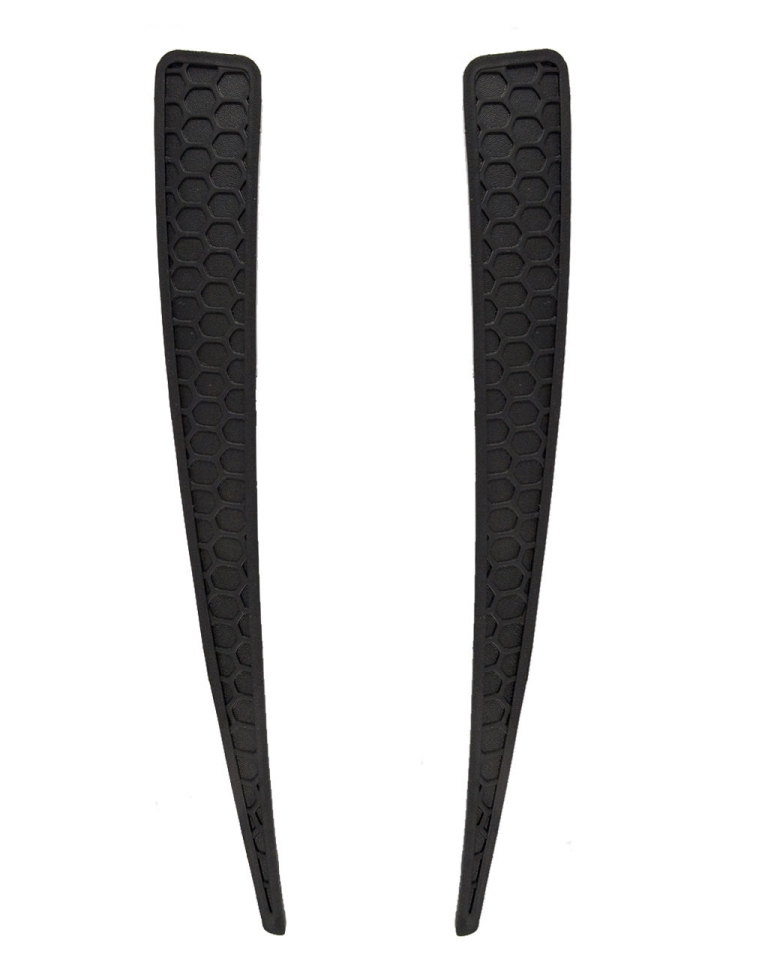
If you are also unusual enough to like these, they can be snagged easily through the internet or any Ford dealer still. The part numbers for the scoops themselves are 4R3Z-63279D36-DPTM and 4R3Z-63279D37-DPTM. In addition, the "honeycomb" inserts are 1R3Z-63279D38-AAA and 1R3Z-63279D39-AAA. The pictures above show the scoops in their bare state when new, and then right before installation with the fresh paint. They are also shown at the top of this page and will appear in other places on the site as well.
The swap is actually quite simple too: since the scoops are held on by six plastic push pins, they literally just pull right off. Actually, you want to pull the front edge out first, then push them rearward to keep from breaking the tabs - just an FYI! There is also a foam "gasket" behind each of them that seal off a small cavity in the quarter panel - definitely worth keeping (a bit of spray adhesive helped them stick back on). Once I cleaned the dust off the sheet metal, re-attached the gasket, then transferred the push-pins, the new scoops simply popped right in to place. Another unique touch that came out perfect.
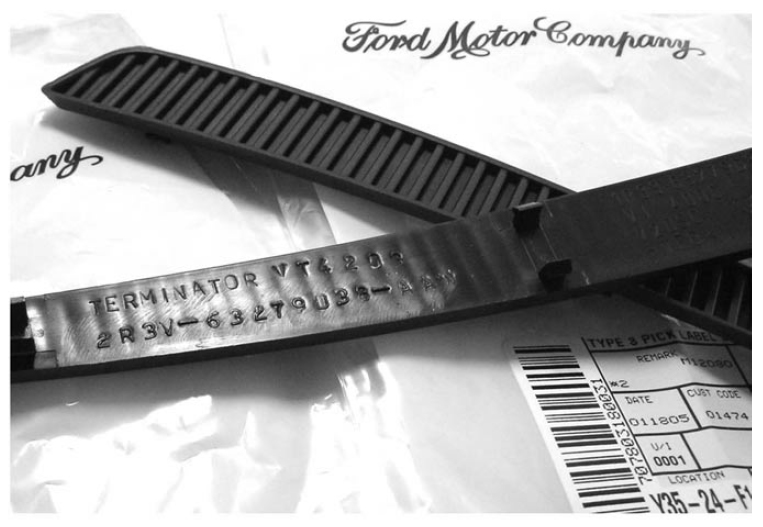
Note: The Terminator side scoops contain specific inserts that have a grill pattern that matches the hood vents. Like so many other parts out there, they are obsolete. Fortunately, those for the Mustang GT from 2001 and up will fit, but they have the honeycomb pattern in them instead. For those that have read Iron Fist, Lead Foot, you'll recall that the inserts are the only parts on the car that actually have "Terminator" embossed on them - some cool trivia for sure!
For those still hanging on to the archaic factory prop-rod, I'll have to ask: Why? Not only do aftermarket hood struts work very well to hold up your hood, they are out of your way when working over the engine. I chose to pick up the QuickLift Plus kit from Redline Tuning. I used them first on my stock Terminator hood, and then easily switched them over to the new hood without any issue thanks to an additional bracket kit. They've worked flawlessly and definitely look great.
Not that I need to point out the obvious (well, maybe I do), but one potential drawback with the Redline kit is that you have to drill holes in the hood so the upper brackets can be attached with rivets. I will admit, however, that I initially shied away from other no-drill kits because I just didn't want to fuss with the OEM hood studs (yes, I was paranoid about snapping them). That really wasn't a big deal, since I ultimately removed the factory hood, and once the paint was scuffed from the studs, there were no problems.
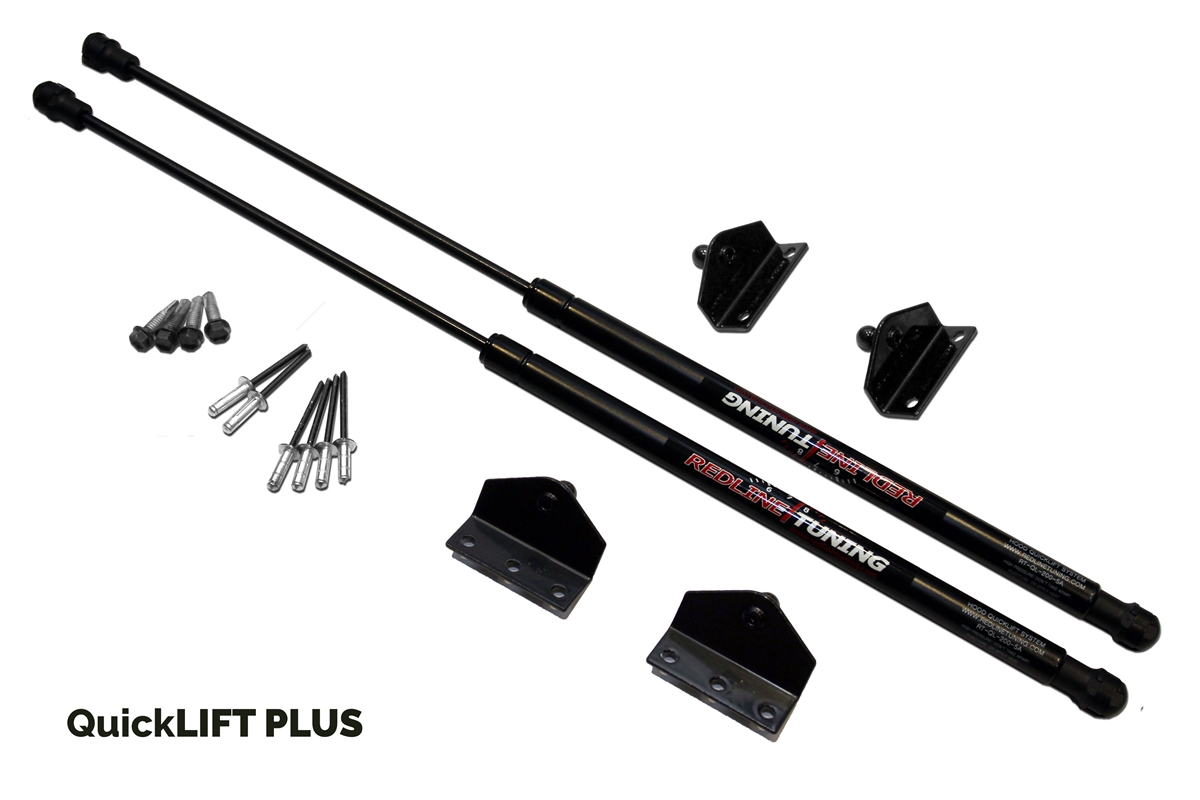
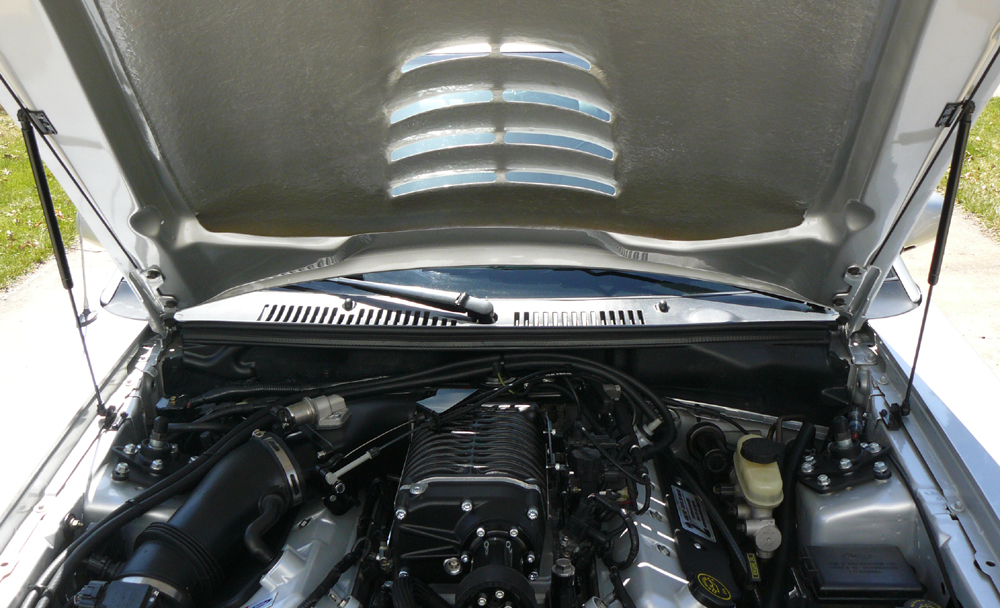
On a better note, when my new '00R hood was being made, extra reinforcement was added on the sides since I planned to rivet the brackets on again for this kit. Somehow, the thought of drilling six more holes in yet another perfectly good hood bothered me less than the slim chance that I could snap a small stud on the factory hood. Go figure. After three years and counting, the struts are trouble-free and do a great job of raising and holding up my hood. They also have a clean look, as seen in the picture above, and despite what some may think, they are installed correctly - with the piston rod in the down position.
Note: These hood struts are so fantastic that I also added them to my daily-driver 2020 Explorer ST. You know you've found a great product when you not only use it on your toy, but put it to use on other vehicles as well. Even better, they took all of about 15 minutes to install and look like they came there from the factory. For lack of a better word, 'props' to Redline for keeping up the great work!
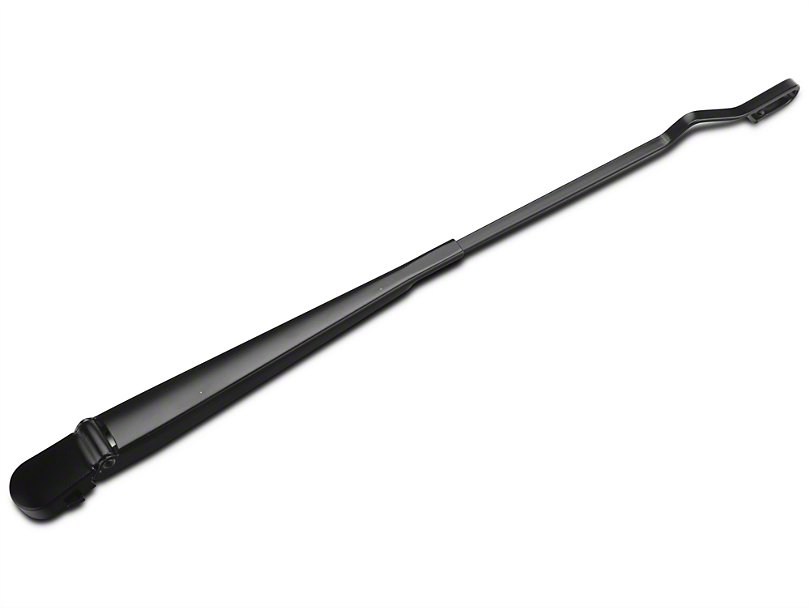
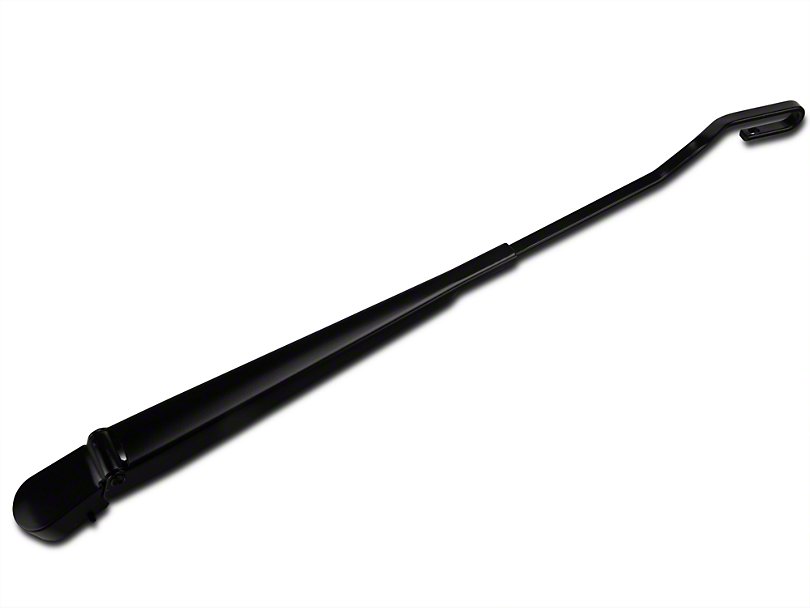
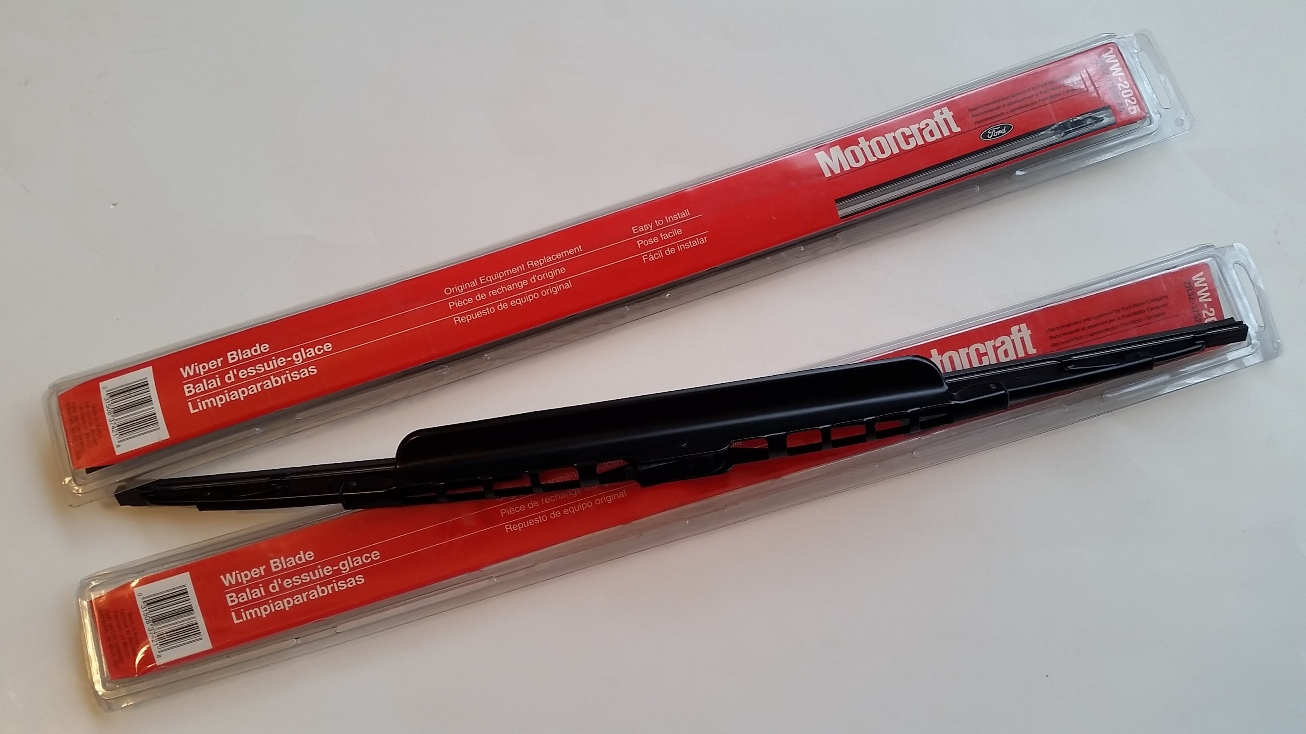 If
you are the original owner of your Terminator, or have one that hasn't been
through a long list of abusers, you may be fortunate enough to still possess the
unique "airfoil" wiper blades that came from the factory. Unless you've
been living under a rock - or haven't read
Iron Fist, Lead Foot - you
should know that these blades were another specialty part adapted specifically
to the Terminator (they are mentioned right on
p.70 of v.1, and p.69 in v.2). For some
useless trivia, they were originally made in Germany by
SWF - for Spezial
Werkzeugfabrik Feuerbach - a subsidiary of Valeo, and are a slightly smaller
version of one also made for Porsche. As usual, they are
also long obsolete from Ford. Too bad.
If
you are the original owner of your Terminator, or have one that hasn't been
through a long list of abusers, you may be fortunate enough to still possess the
unique "airfoil" wiper blades that came from the factory. Unless you've
been living under a rock - or haven't read
Iron Fist, Lead Foot - you
should know that these blades were another specialty part adapted specifically
to the Terminator (they are mentioned right on
p.70 of v.1, and p.69 in v.2). For some
useless trivia, they were originally made in Germany by
SWF - for Spezial
Werkzeugfabrik Feuerbach - a subsidiary of Valeo, and are a slightly smaller
version of one also made for Porsche. As usual, they are
also long obsolete from Ford. Too bad.
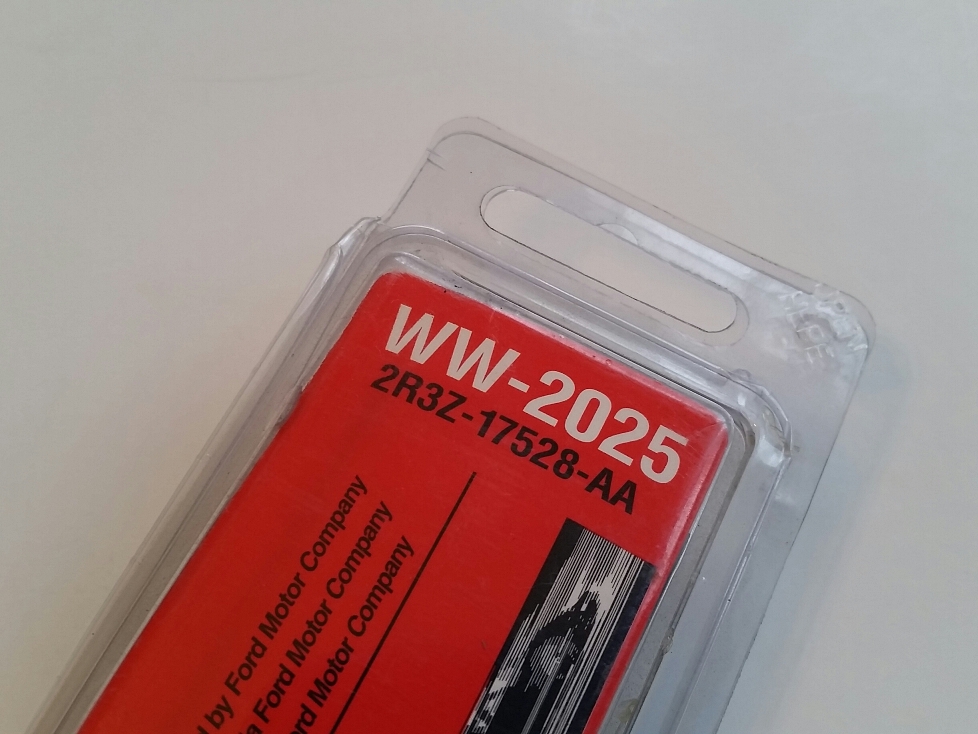
The original 20" assemblies once were listed under the Ford part number 2R3Z-17528-AA, or as Motorcraft WW-2025 (also shown in the thumbnail - yes, I have spares). Due to their rarity, some New Old Stock (NOS) sets have sold through various markets such as eBay for easily $100 or more. If you are a fanatic for originality and still have your OEM set that has seen its better days, never fear since there is a simple and low-cost way to keep them functioning like new: blade refills.
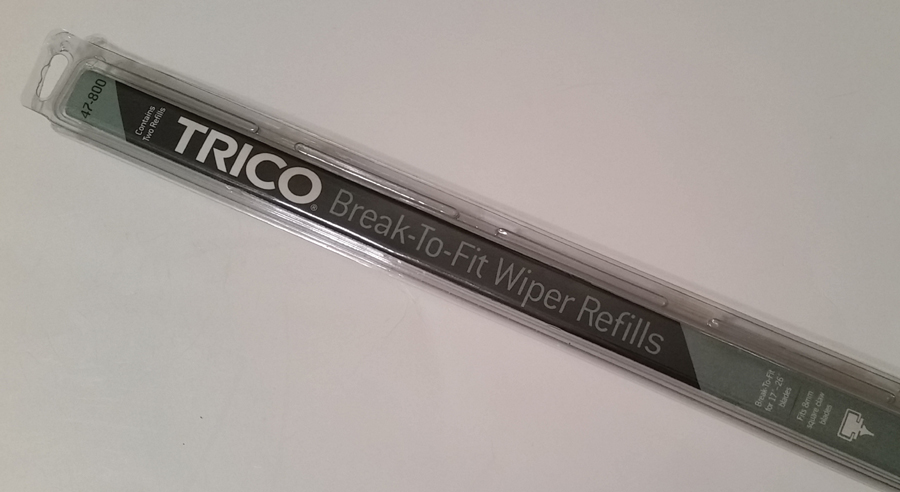
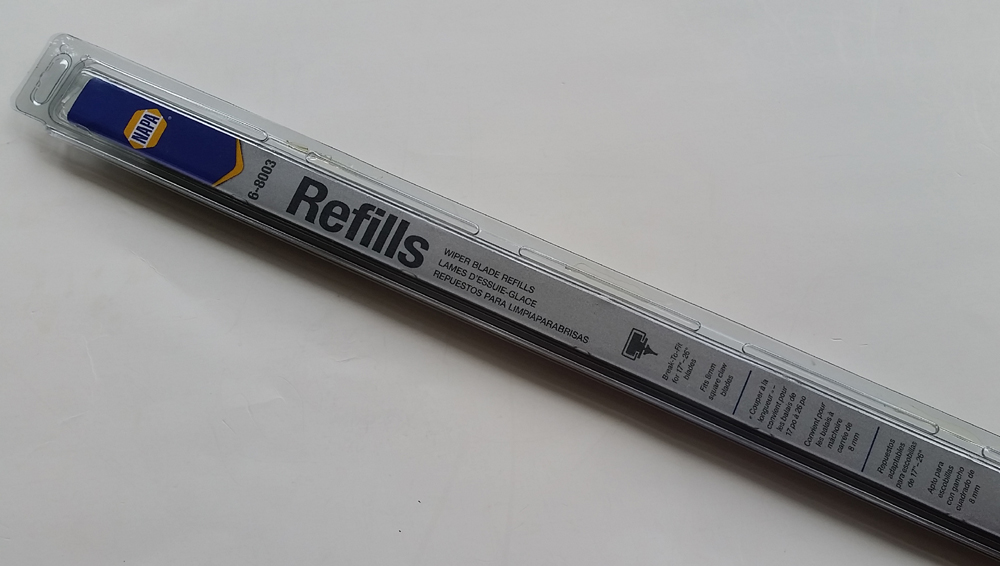
In this day and age, pretty much all wiper blades are plug and play (and definitely meant to be tossed during replacement), so it's not very common to replace just the rubber blade itself. Fortunately, Trico makes it easy by still offering them. Score. For a mere $10, give or take, you can pick up their 47-800 series refills (the 8mm width), and slip them right in - making sure they are cut to the correct length, of course. Alternatively, the NAPA 6-8003 is the same set in their box, if that chain is convenient to you. While many of us don't drive our Terminator's in the rain, you never know when you might get caught briefly under a wet sky (or just need them frequently if your car isn't only for fun on nice days). Even better if you are going a bit fast and want to keep the windshield clean - exactly what these are meant to do!
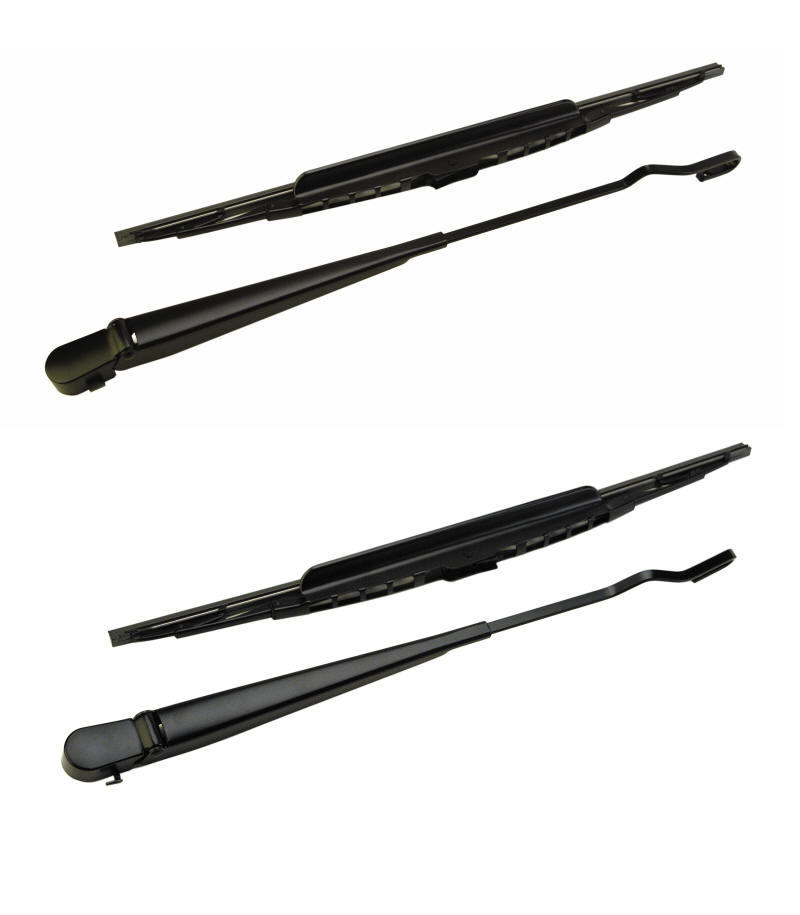
Note: It's also important to mention that these blades only work with their matching arms. Ford racing even once offered a complete kit that was was an upgrade for owners of '99 to '04 Mustangs as M-17528-SC46, but for now, only the arms are in the system. If you are fortunate to acquire the blades but need arms (or just need to replace the arms for whatever reason), they can be found as 2R3Z-17526-AA (R), and 2R3Z-17527-AA (L).
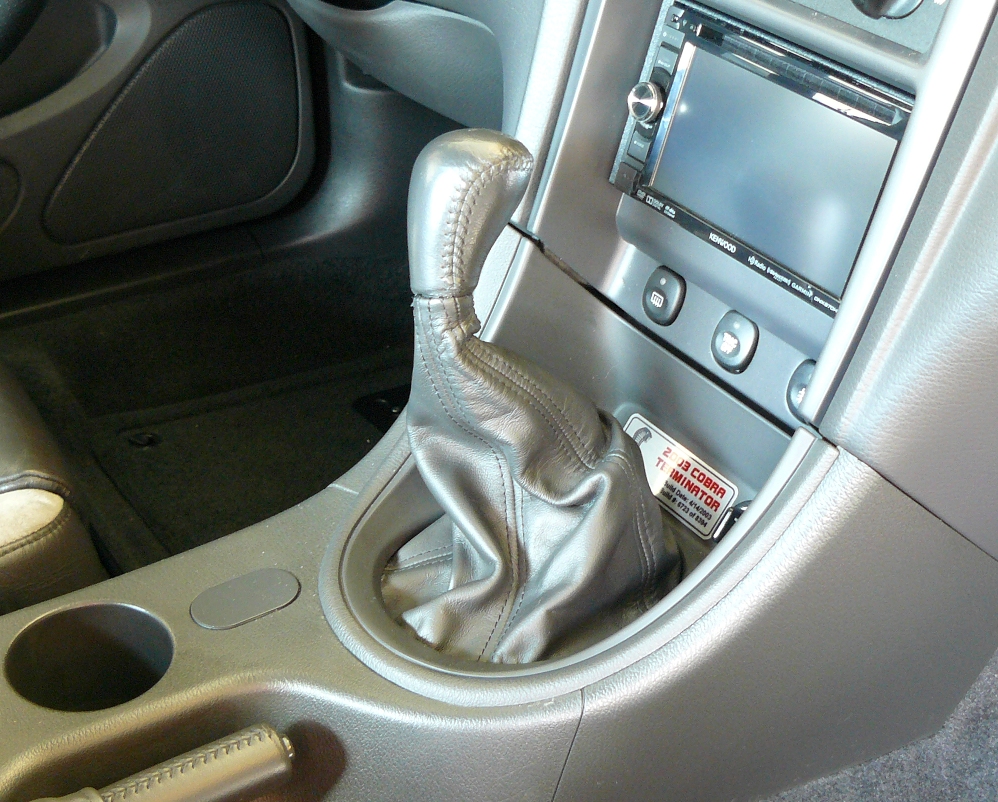
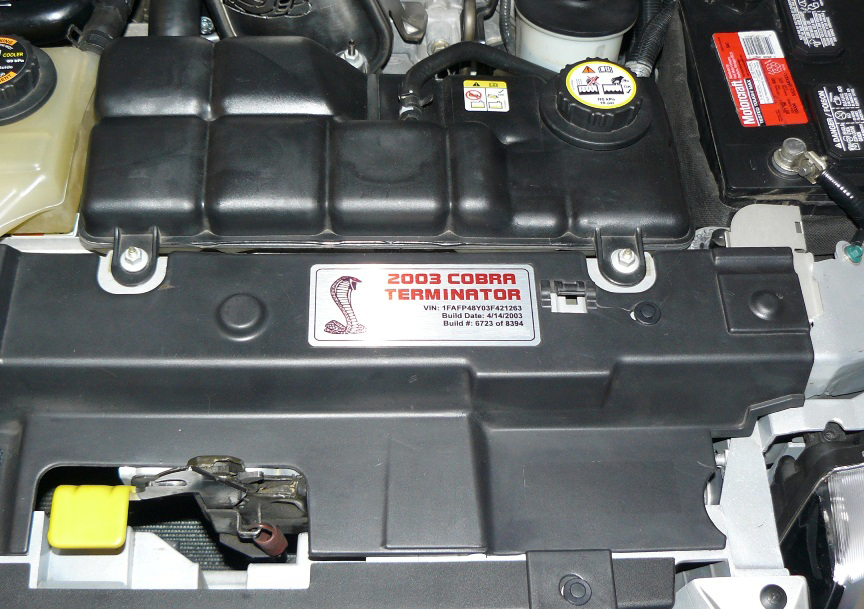
A real nice personal touch that can be added to your Terminator is an aluminum data plate that fits in to the recess on the radiator cover. I figured this was as good of a place as any to put this section even though these come in a set of two, with one here and the other inside the car on the shifter bezel. I actually have a custom signed radiator cover (shown on my SVT Stuff page) but that only comes out for shows. During normal times, my stock cover is always on, which includes the data plate shown below. I jumped on a forum bandwagon several years ago and purchased a set of these through one particular vendor, but he ceased production of them some time soon after. On a good note, there are still other sources, such as those from Jason Shepherd at Anchor Room. Among the myriad of items on his site, including boards for car shows, Jason also makes some real nice plates set up to whatever suits your tastes. As you can imagine, the possibilities really are endless!

![]() An
additional
one I acquired, more for the "collectability", is an example of those sold by the
SVT Store.
Members of the former SVTOA probably know about these, but I figured I would add
a picture of one just to show something different (they are also aluminum, but
the thumbnail image is a slightly edited
proof). Like the others, these come as a set of two, and are shown with
basic information on them including the SVTOA number, but can also be customized
to your liking with many different images. Mine didn't get attached to the Cobra, rather, will be framed and
mounted on the wall with some other SVT memorabilia.
An
additional
one I acquired, more for the "collectability", is an example of those sold by the
SVT Store.
Members of the former SVTOA probably know about these, but I figured I would add
a picture of one just to show something different (they are also aluminum, but
the thumbnail image is a slightly edited
proof). Like the others, these come as a set of two, and are shown with
basic information on them including the SVTOA number, but can also be customized
to your liking with many different images. Mine didn't get attached to the Cobra, rather, will be framed and
mounted on the wall with some other SVT memorabilia.
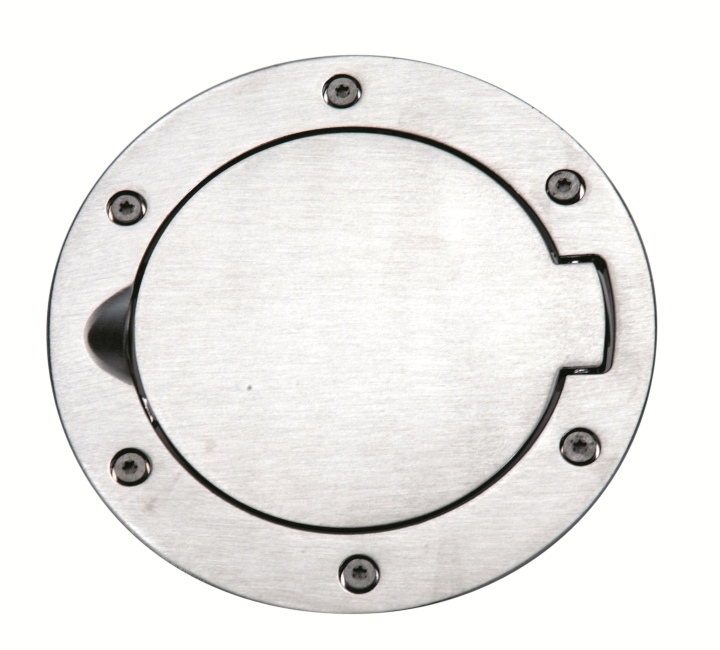
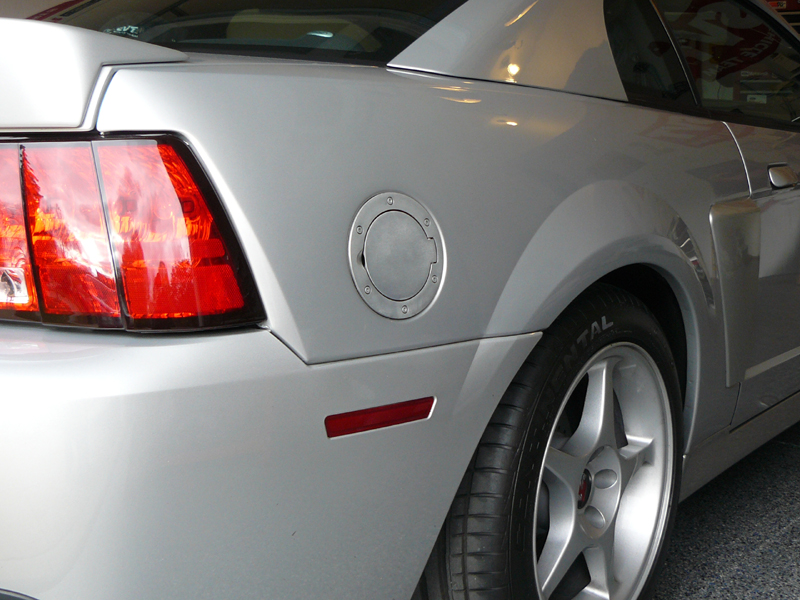 The aluminum fuel door was one of many
unique parts from the Bullitt that fit
perfectly on all '99 to '04 Mustangs. With a silver car, this is
one accessory that just looks great and doesn't stand out too much. They've become so popular over the years that plenty of imitations have
even popped up. Still, there is nothing like an original part, and that is definitely
true here. Even better, you can toss the flimsy factory stamping while adding a
solid piece with a touch of class.
The aluminum fuel door was one of many
unique parts from the Bullitt that fit
perfectly on all '99 to '04 Mustangs. With a silver car, this is
one accessory that just looks great and doesn't stand out too much. They've become so popular over the years that plenty of imitations have
even popped up. Still, there is nothing like an original part, and that is definitely
true here. Even better, you can toss the flimsy factory stamping while adding a
solid piece with a touch of class.
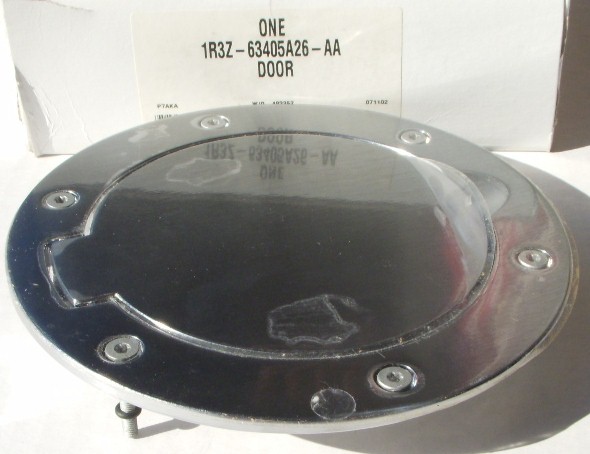
The door is actually made for Ford by a company called AMP Research and was available through Ford Racing as M-2301-E. If you happen to find the Ford version out there, it was 1R3Z-63405A26-AA even though it is now officially obsolete. For more than you ever wanted to know about it, check out the patent document.
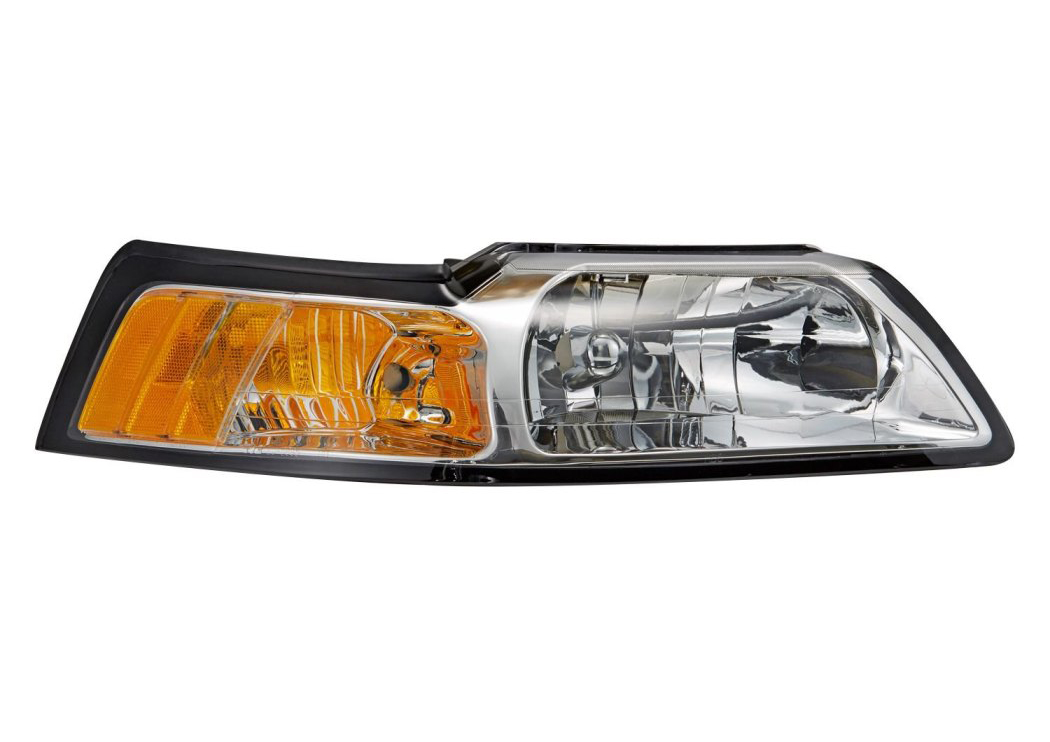
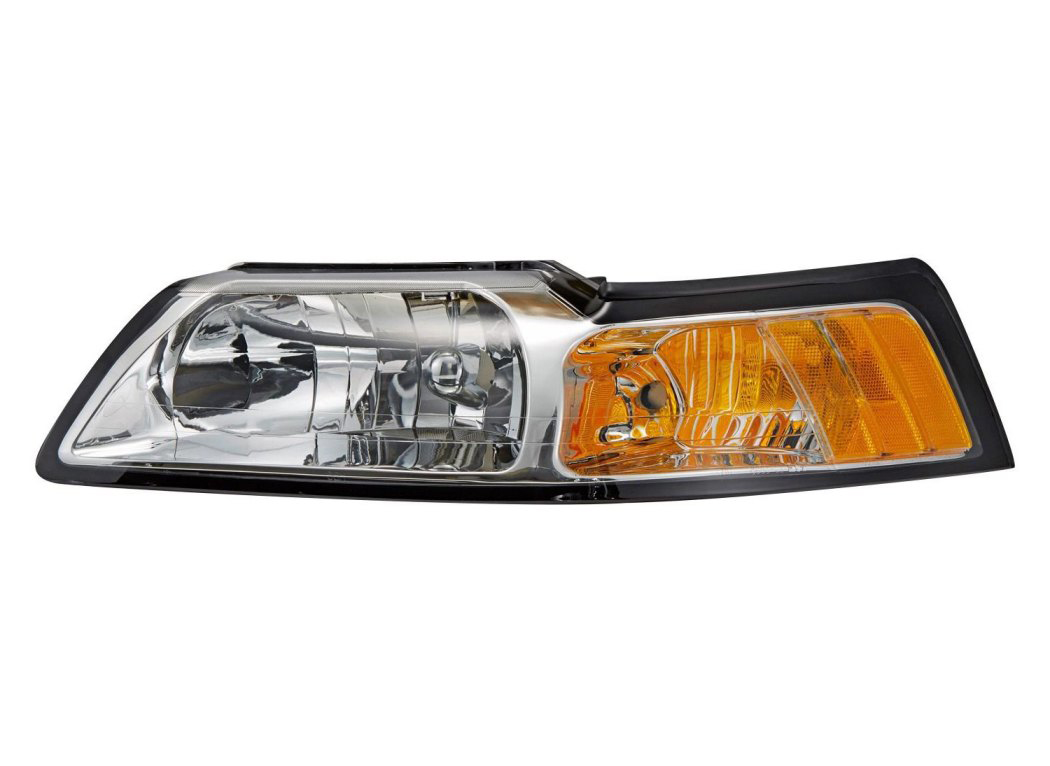
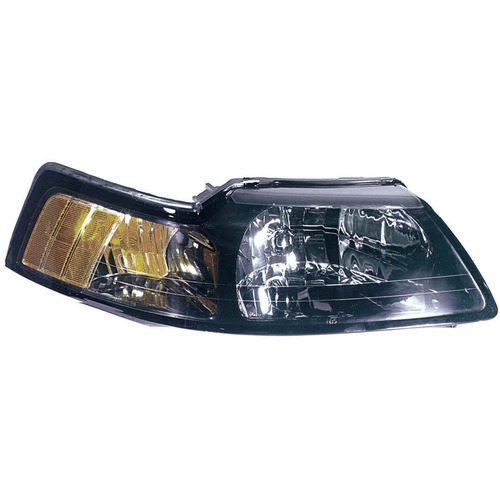
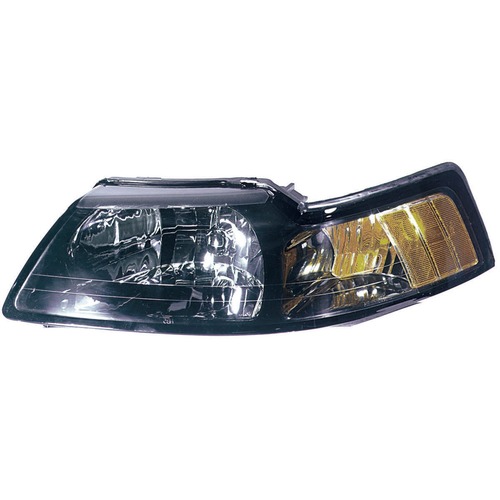
Not one for liking the trend of "blacking out" certain items on cars, I was actually never a fan of the original "smoked" headlights that became a Mustang norm in 2001. With a silver car, the dark headlights just didn't look right. I definitely didn't want to replace the OEM parts with low quality leak-prone aftermarket offerings, and I have yet to jump on a Bi-Xenon retrofit. Fortunately, there was a solution: original Ford clear headlights that were standard on the 1999 Cobra (as well as any '99-'00 Mustang).
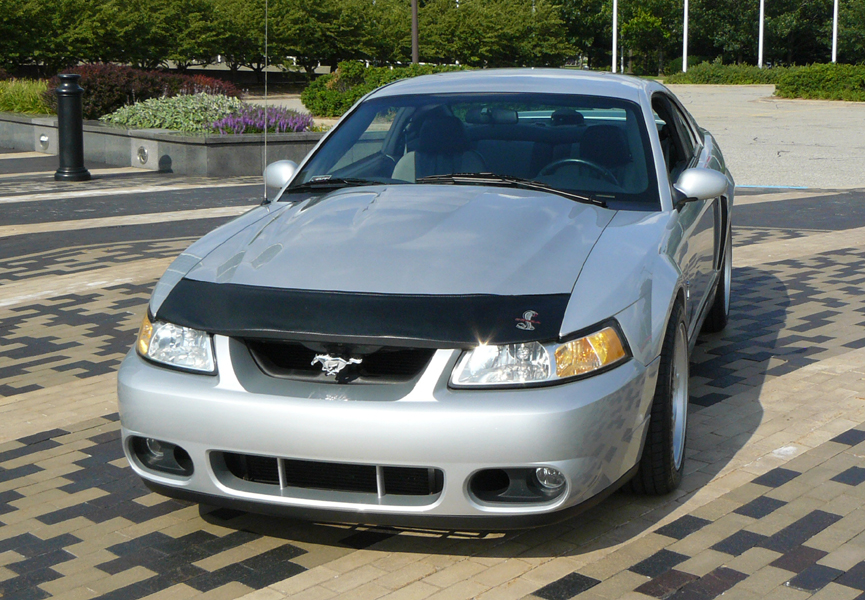
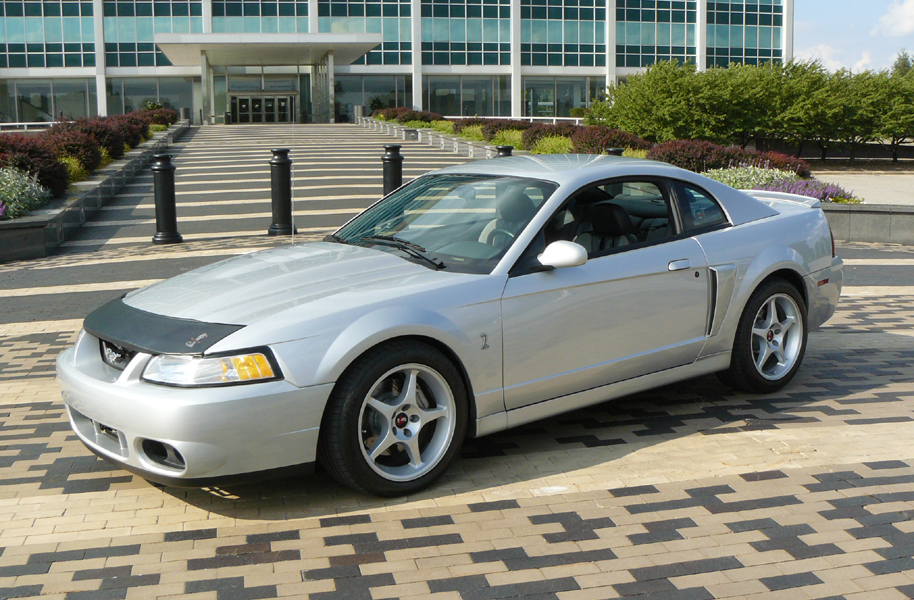
On an unfortunate note, new replacements through Ford were almost twice the price as the smoked versions, so that didn't thrill me. Luckily enough, I was able to find not one, but two mint condition sets on the internet for less than what a single Terminator headlight would cost. I suppose the popularity of the newer style has made it easier to acquire these, but I was perfectly happy to get my hands on them. Even better - they look perfect.
Adding to this, I decided to up the lighting power just a hair (for now) with another simple addition: Sylvania Silverstar Ultra bulbs. It was easy enough to add the new bulbs while the housings were out, and while I was at it, I swapped the fog light bulbs as well. The new output was noticeable, but for whatever reason, I neglected to snap any pictures. In any case, the pictures above, taken in front of Ford HQ in 2012, show how nice the clear headlights look.
Note: If you have to replace headlights, the OEM Ford parts are always going to be the highest quality, but they are gradually being phased out. For Terminator owners, the factory versions were 3R3Z-13008-CA (R) and 3R3Z-13008-DA (L). For the earlier clear look, their part numbers are - or were: YR3Z-13008-AA (R) and YR3Z-13008-BA (L). If those don't turn up, a second option (if you are picky) is to look for those that are CAPA Certified, meaning held to the highest quality standards for aftermarket parts, especially headlights. A worthwhile company to check out here is OE supplier TYC Genera. If you like the '99 clear look, the CAPA Certified TYC lamps carry the part numbers 20-5695-01-9 and 20-5696-01-9. For the fans of the smoked version, check out 20-5695-91-9 and 20-5696-91-9. They are not only economically priced, but will look great and actually last.
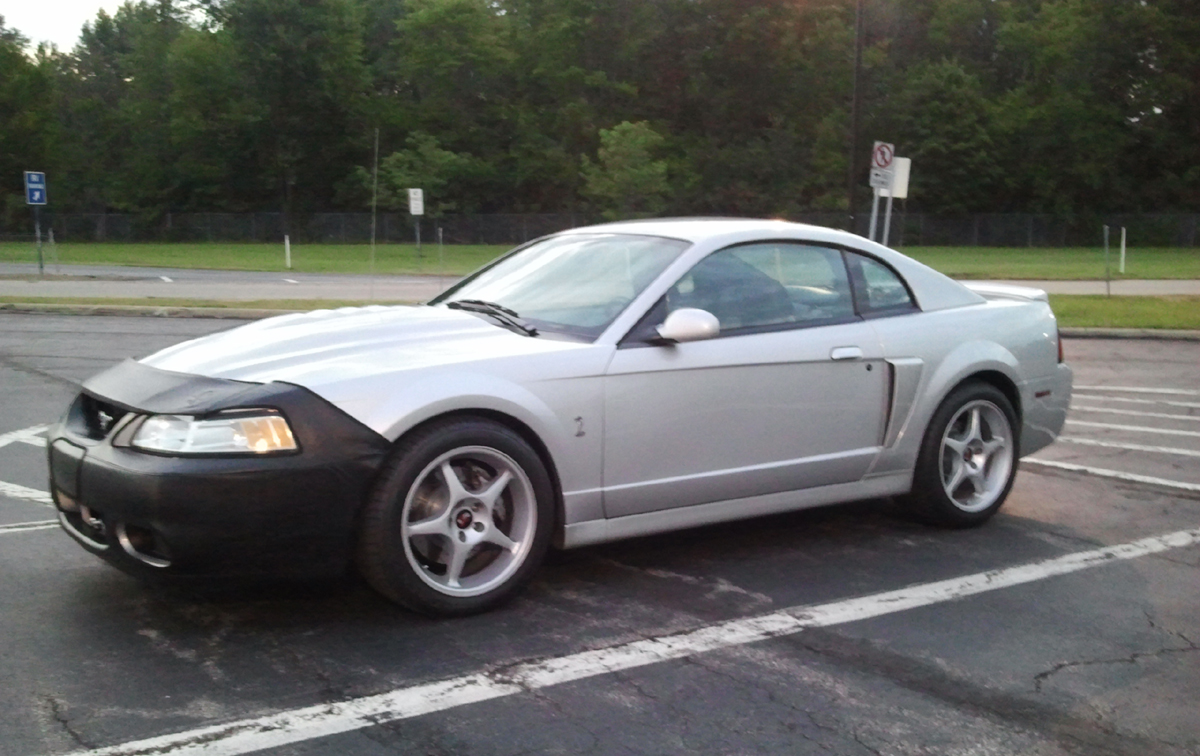
 Yes,
these are definitely out of fashion. At the moment,
however, it beats getting any rock chips on my nice
hood. Besides, I always like to get my hands on Ford aftermarket parts, and I
was happy to score this complete mask in like-new condition for a great deal.
There is also a lower half that covers the complete bumper,
but unless
I'm taking a road trip, it rarely gets used (it's obviously left off in the
pictures above).
Yes,
these are definitely out of fashion. At the moment,
however, it beats getting any rock chips on my nice
hood. Besides, I always like to get my hands on Ford aftermarket parts, and I
was happy to score this complete mask in like-new condition for a great deal.
There is also a lower half that covers the complete bumper,
but unless
I'm taking a road trip, it rarely gets used (it's obviously left off in the
pictures above).
I've contemplated adding the Xpel Ultimate film one of these days, but I have yet to get moving on that. For now, the "mini-mask" works just fine (and there are several different aftermarket companies that still do make them). There is no big surprise as to how it fits, but if you happen to come across one on the used market, the Ford instructions have some useful details. These don't pop up often, but the Ford kit once was 3R3Z-19A413-AA, so keep your eyes open if you are on the hunt!
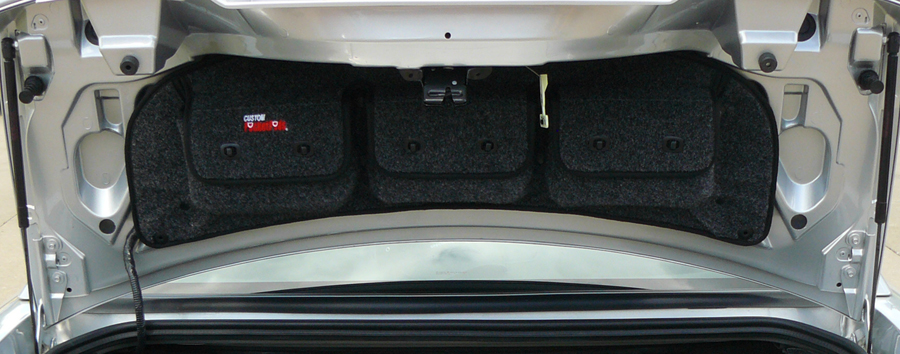
If you are even a bit fanatical about organization, this CoverCraft pod is a great add-on. Not only does it match the factory trunk fabric, it covers up the bare underside of the deck lid. Even better, the three pouches are great to stash small items, especially the owners manual binder that just doesn't quite fit in the glove-box or the center console.
I definitely wasn't a fan of any sort of filler panel displaying the word "Cobra" or "Terminator", so this was a perfect choice. Even better - it is functional. If you like it and would be interested in snagging one, its item number is TO1013CH, and it can be found on the internet from many sources for right around $110.
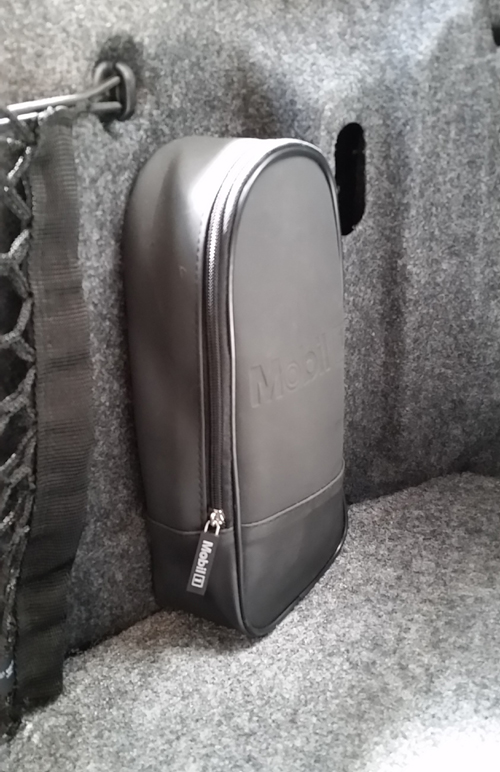
![]() This
is something totally trivial, but for those of us that like to be organized, it
was a neat add-on. Since I like to always carry a quart of oil in the car, and
don't want it rolling around in the trunk, I picked up a very cool velcro-backed
Mobil1 oil pouch,
courtesy of Porsche. This vinyl pouch fits a quart bottle of oil and comes with
a small foldable funnel and a pair of rubber gloves in case you are picky about
getting your hands dirty in the event you have to get under the hood while out
and about. There is also a bit of extra room in it to keep a small rag, so even
better.
This
is something totally trivial, but for those of us that like to be organized, it
was a neat add-on. Since I like to always carry a quart of oil in the car, and
don't want it rolling around in the trunk, I picked up a very cool velcro-backed
Mobil1 oil pouch,
courtesy of Porsche. This vinyl pouch fits a quart bottle of oil and comes with
a small foldable funnel and a pair of rubber gloves in case you are picky about
getting your hands dirty in the event you have to get under the hood while out
and about. There is also a bit of extra room in it to keep a small rag, so even
better.
It can be found through any Porsche dealer under their part number PNA000-100-19 (shown in the thumbnail), but I grabbed mine off eBay for less than $20. I didn't necessarily like their logo on it, but it wiped right off thanks to a bit of Acetone (it still has "Mobil1" embossed on it, which is perfect since I am a fan). I stuck it to the rear trim panel, forward of the driver's side tail light where it is completely out of the way. With the velcro holding it on, it has never come loose. It's definitely a case where form and function came together perfectly, and for the most part, you probably will forget it's back there - until you really need it.
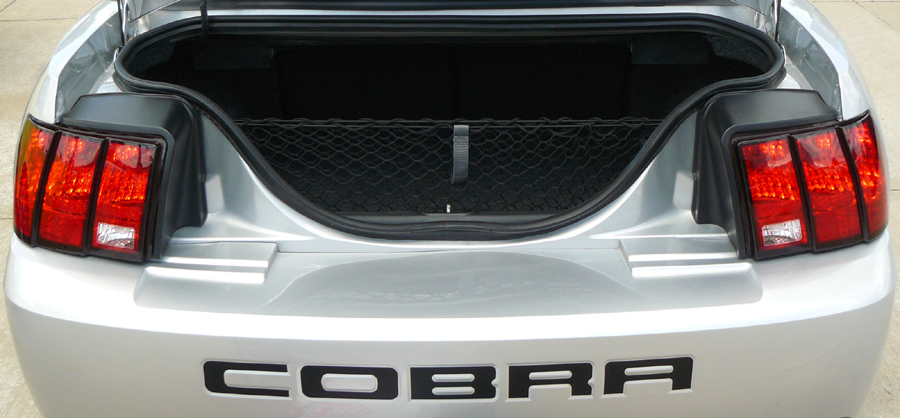
This one is simple - especially if you are still staying on the organized side. The OE cargo net slips on to two existing posts behind the tail-lights (used to secure the rear panel), and hangs right across the trunk opening as seen below. It is not only functional, but fairly unobtrusive and easy enough to pop off when the need arises. The Ford part number is F5CZ-54550A66-AA and it goes for about $40.
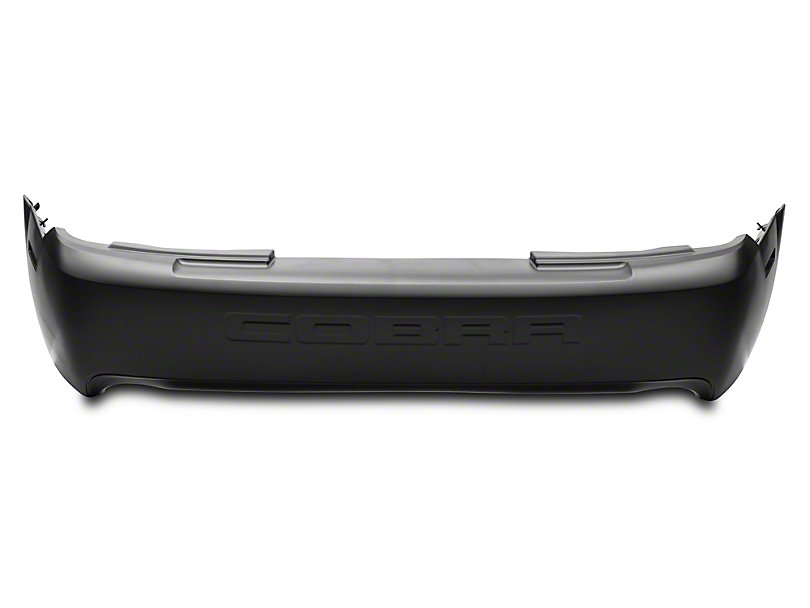
Like the front end, the rear bumper cover is also specific to the Terminator. They are also still available from Ford, 2R3Z-17K835-BA, and go for about $450. As most know, it has the "COBRA" lettering embossed in it, which was a change in 2001, and also has a subtle darkened - and unpainted - lip above the exhaust tips instead of the louvered grate. Definitely an improved look.
This is an area where tastes vary considerably, but stick-on inserts to accent "COBRA" are very popular to make the back stand out just a bit more in case your exhaust note doesn't do that already! What appealed to me was a matte-black finished decal (rather than a metal insert) that matched the lower trim - easy enough. My initial foray in to this was on the inexpensive side since I wasn't sure if I'd really like them: I picked up a set from a vendor on eBay (licensed, of course), but while smoothing out the air bubbles, I ended up slightly gouging one of the letters.
No worries though, since I decided they were a great addition and were worth replacing. For the second round, I decided to splurge and go with a one-time big name in Ford graphics (that unfortunately appears to no longer be around): Bob White decals. The new set was noticeably thicker and still looked great. I didn't bother to get any close-up's, but they are easy enough to see in the picture above. These are another nice touch to let everyone know you aren't driving a regular Mustang!
Note: Since tastes do vary when it comes to these personal touches, so do the sources to acquire what fits your needs. While I mentioned the vendor I acquired my inserts from, there are definitely many others out there. If you like different patterns, colors, and materials, all it takes it a simple internet search to bring up a wide selection. Even better, if you try one version and decide to move on, these "decals" are a breeze to remove and replace.